| | My 70 Bus!! |  |
|
+16west coast ghia euphgirl Breck Jeff67Sqbk mikeinch dsimas Submarine Driver sactownbug Davids74Super Smogman72 Mateo type 4 60herbie53 916pat silvertonguedevil justcruzin 20 posters |
|
| Author | Message |
|---|
justcruzin

Posts : 810
Join date : 2011-07-29
Location : Sacramento CA
| | Subject: Re: My 70 Bus!! Fri Mar 01, 2013 8:27 pm | |
| Ok, just a quick little update. Today I installed my new check strap for the sink cupboard door. Before, 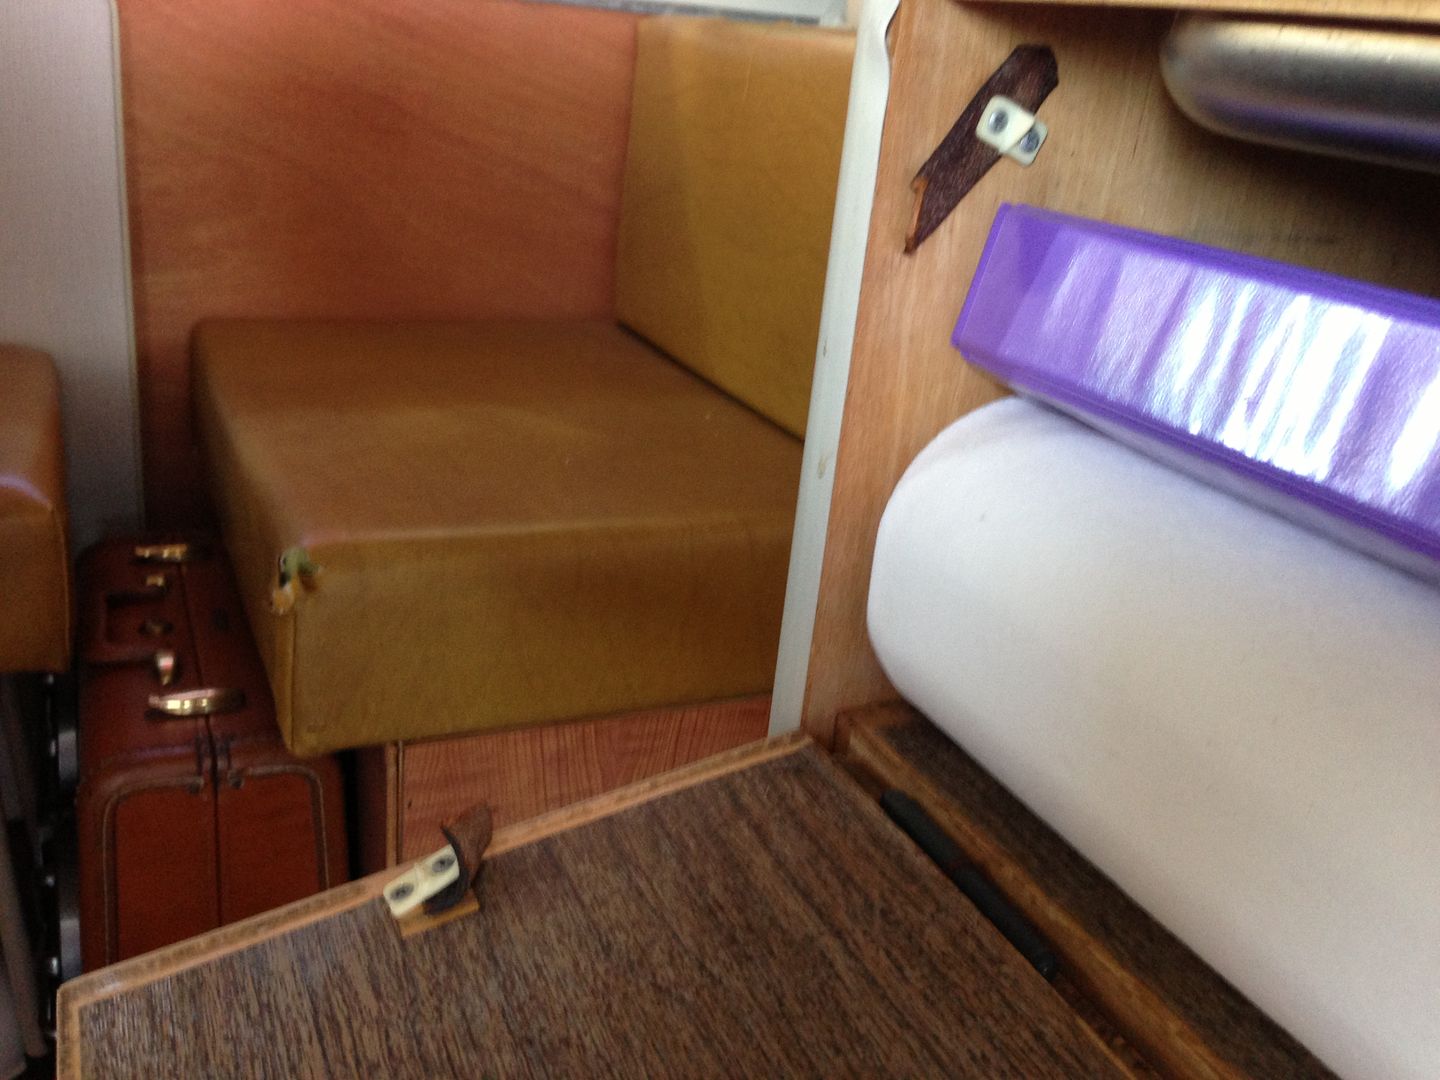 After, 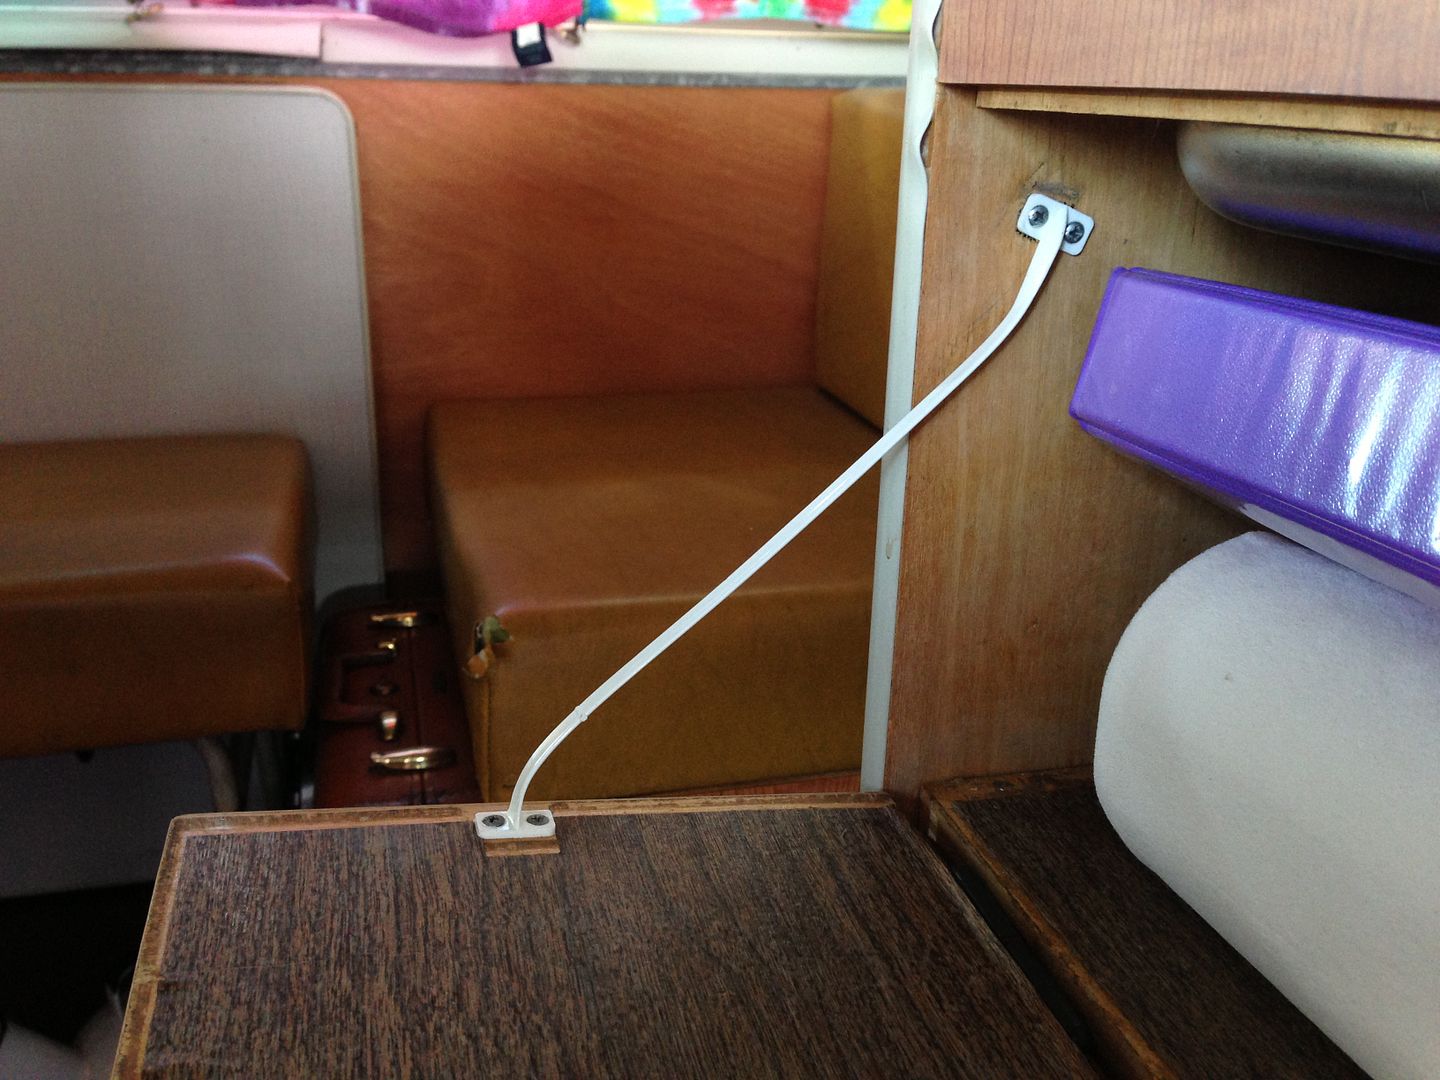 I also wanted something different for a shift knob. I got really interested in Marble knobs. I found this one on Ebay for a total of 7 bucks. 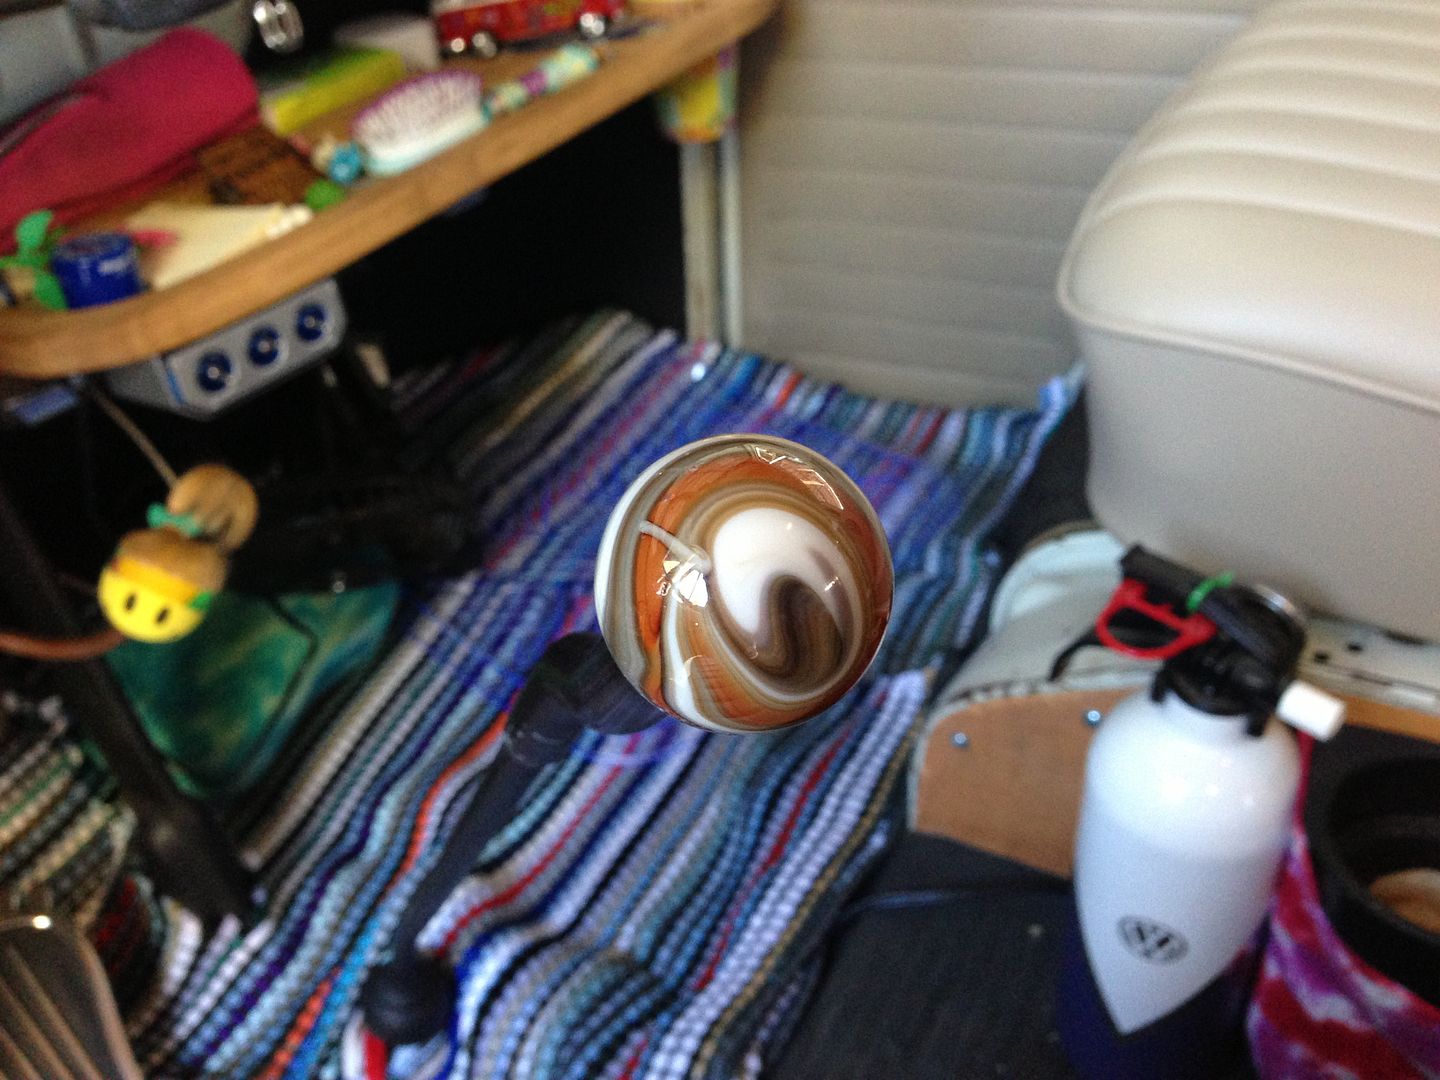 Now I have a new fettish, collecting Marble shift knobs! LOL  | |
|
| | |
badfishie
SacTown

Posts : 234
Join date : 2011-05-25
Age : 48
| | Subject: Re: My 70 Bus!! Tue Mar 05, 2013 5:06 pm | |
| Looking good KIm....
No pics to post but Saturday we got DD's rear hatch hinges replaced and a new rear hatch seal installed with the help of Robert Skinner. Slowy DD is being brought back to where she should be.... | |
|
| | |
justcruzin
Posts : 810
Join date : 2011-07-29
Location : Sacramento CA
| | Subject: Re: My 70 Bus!! Tue Mar 05, 2013 10:09 pm | |
| - badfishie wrote:
- Looking good KIm....
No pics to post but Saturday we got DD's rear hatch hinges replaced and a new rear hatch seal installed with the help of Robert Skinner. Slowy DD is being brought back to where she should be.... Thanks Andy. | |
|
| | |
justcruzin
Posts : 810
Join date : 2011-07-29
Location : Sacramento CA
| | Subject: Re: My 70 Bus!! Thu Apr 04, 2013 2:21 pm | |
| Well, after only 2 years of having the mud flaps for the front of my bus, I finally put them on last night. I debated for a long time on how I was going to mount them. Did a lot of searching and finally saw something I kind of liked. Here are the pics. Before  After,  I have a side step so this one isn't seen as well. Should help keep mud of my side step though. Before,  After,  A side view of front and back flaps together. 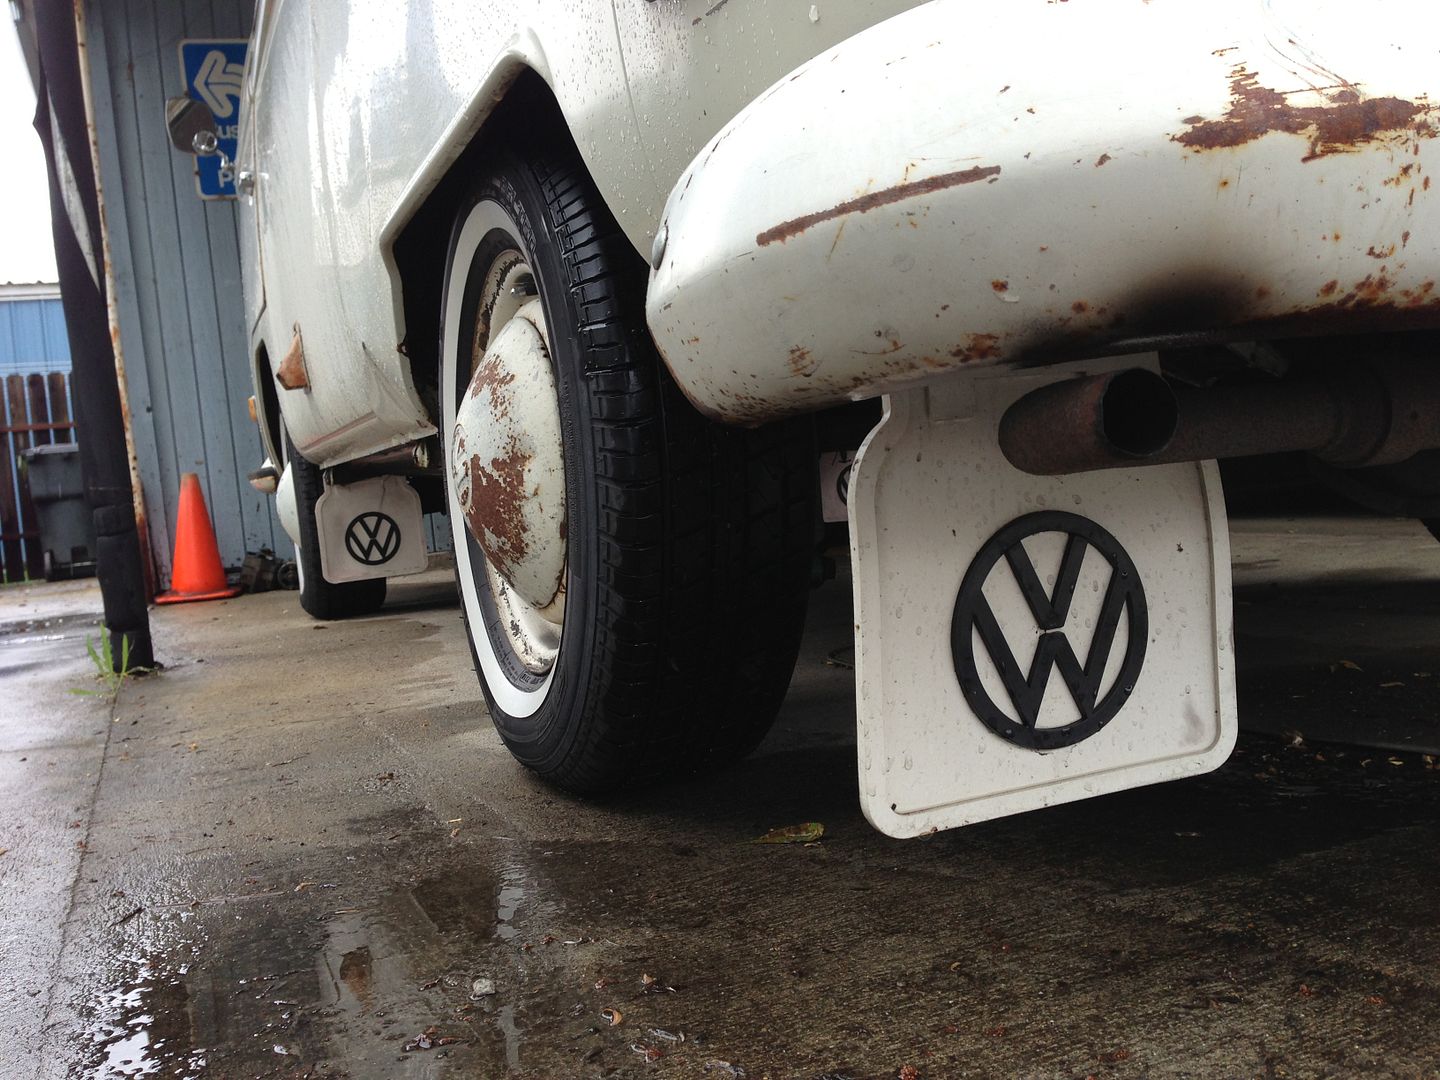 Here is a pic of how I mounted them. The red arrow points to a hole that we drilled so if the mud flap moved up and down or made any rattling noise, we could put a spacer and another screw in it and screw it to the body. So far my first test drive went good with out it. 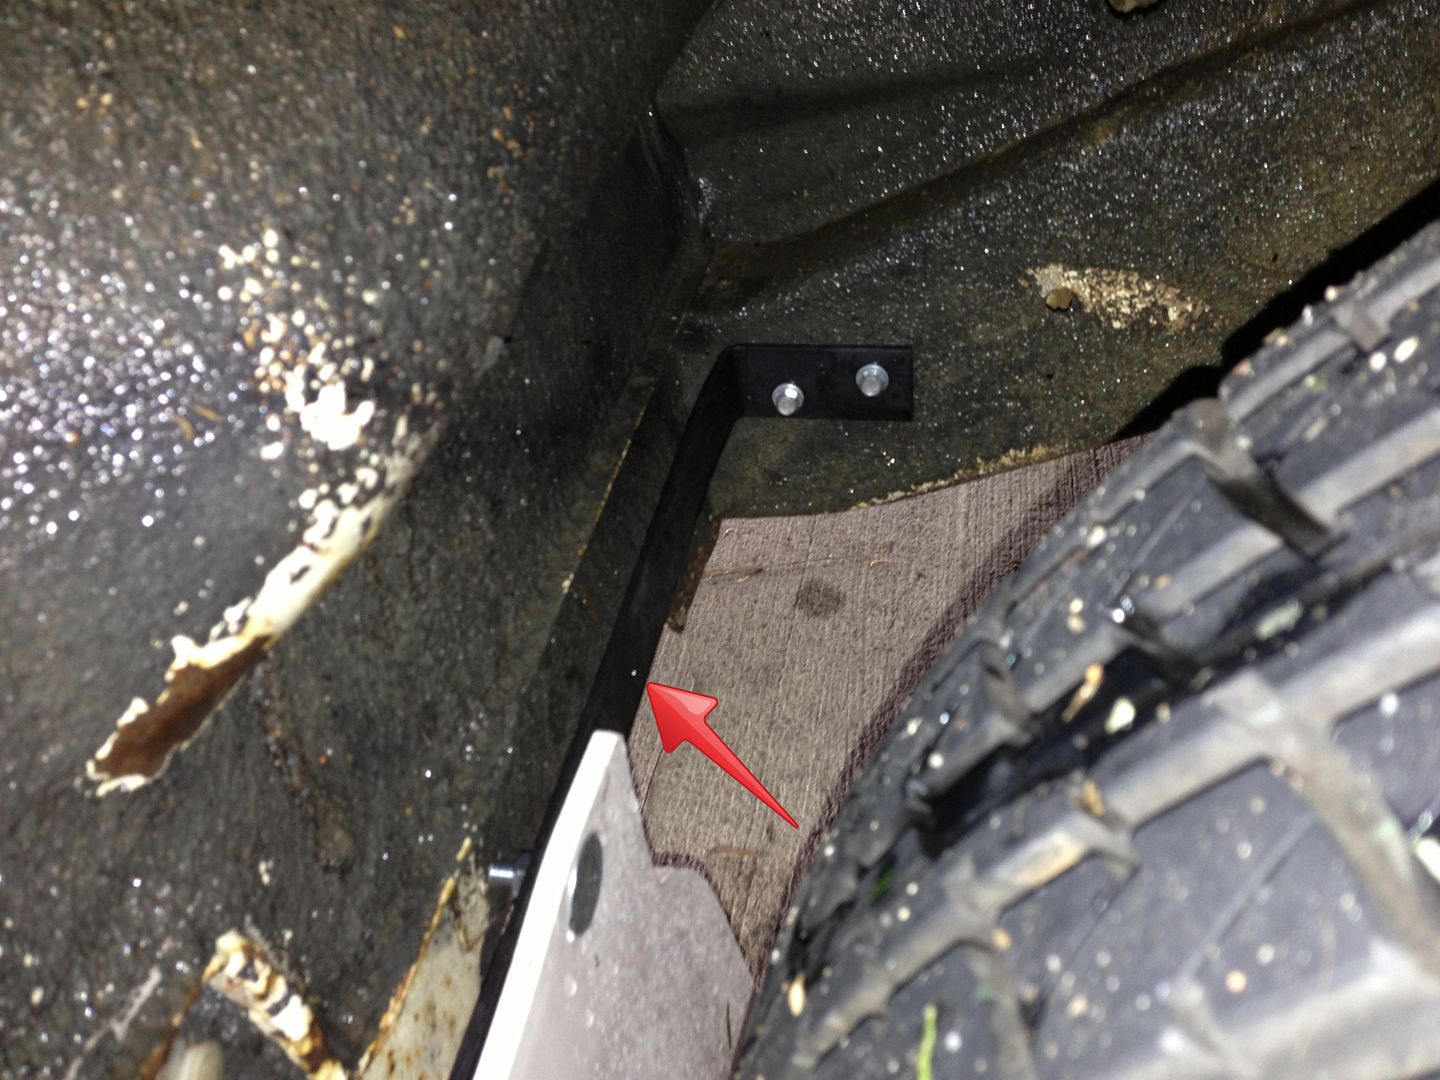 One last pic of another side view. It was raining today and it did a good job of keeping the water off the side of the bus! LOL Ok just kidding.  Now I just need to wait for a sunny day so I can clean them. They got pretty dirty laying around in the garage. | |
|
| | |
MoonMullins

Posts : 95
Join date : 2012-03-14
Location : Sacramento
| | Subject: Re: My 70 Bus!! Thu Apr 04, 2013 2:25 pm | |
| Thought they would look real nice on mine .  | |
|
| | |
justcruzin
Posts : 810
Join date : 2011-07-29
Location : Sacramento CA
| |
| | |
MoonMullins
Posts : 95
Join date : 2012-03-14
Location : Sacramento
| | Subject: Re: My 70 Bus!! Thu Apr 04, 2013 3:00 pm | |
| That's what made them cool was the red tint. LOL | |
|
| | |
justcruzin
Posts : 810
Join date : 2011-07-29
Location : Sacramento CA
| |
| | |
MoonMullins
Posts : 95
Join date : 2012-03-14
Location : Sacramento
| | Subject: Re: My 70 Bus!! Thu Apr 04, 2013 3:12 pm | |
| | |
|
| | |
justcruzin
Posts : 810
Join date : 2011-07-29
Location : Sacramento CA
| | Subject: Re: My 70 Bus!! Sat May 18, 2013 8:10 pm | |
| Just a little update. Today I made a spare tire pad. Started with this.  All put together,  Put in place. 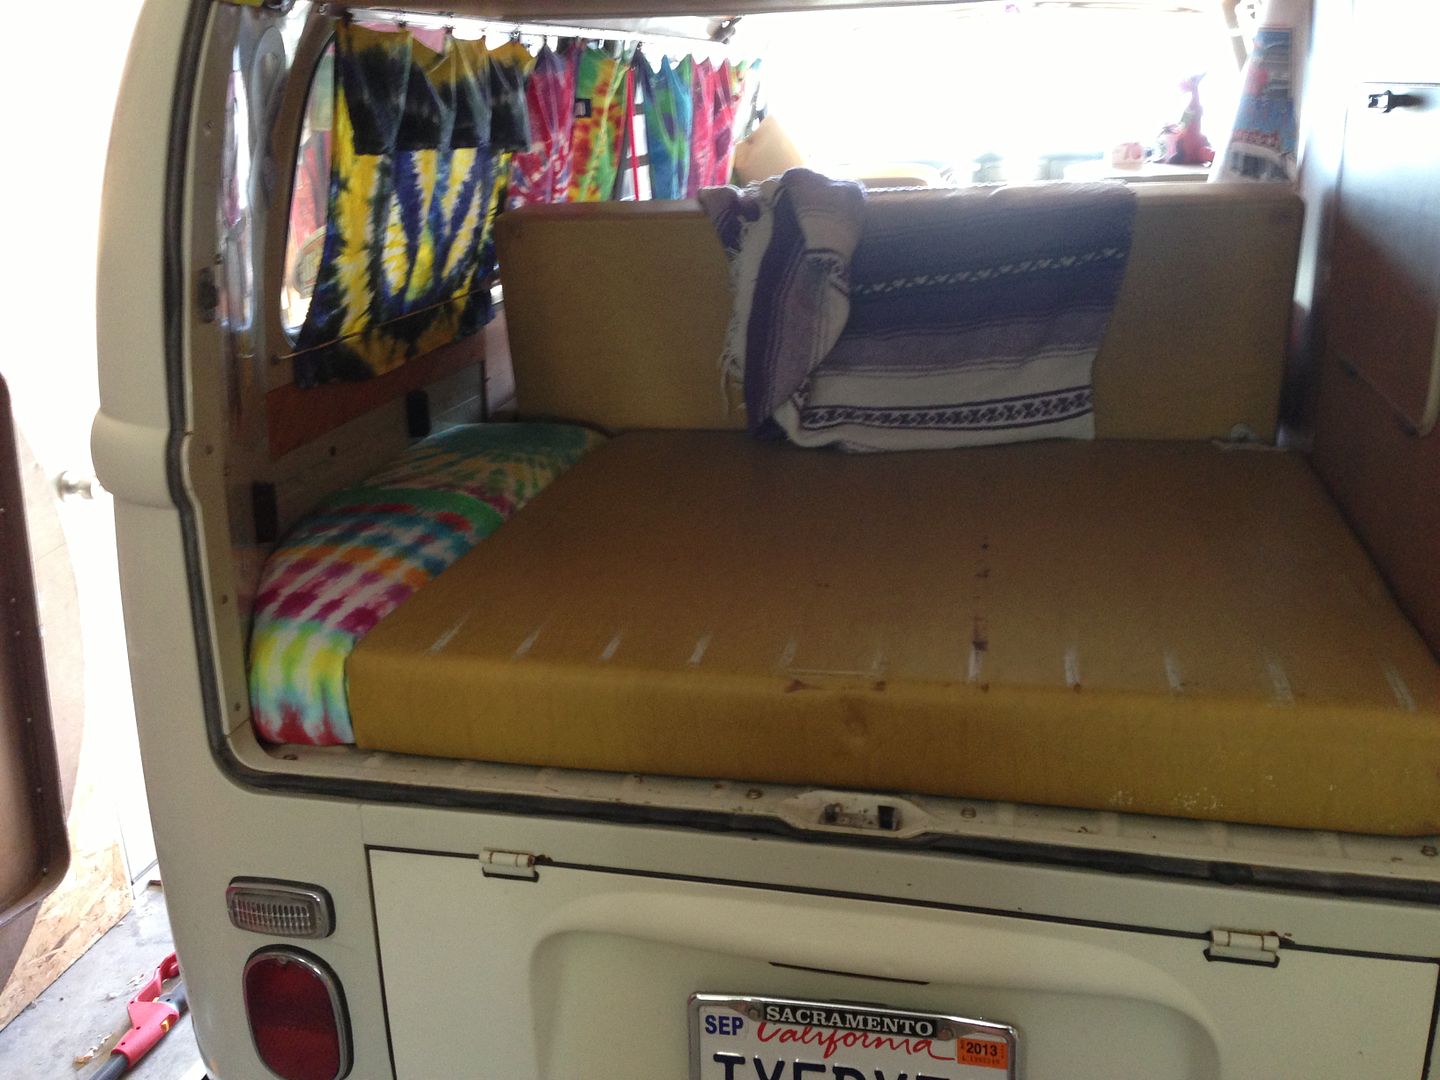  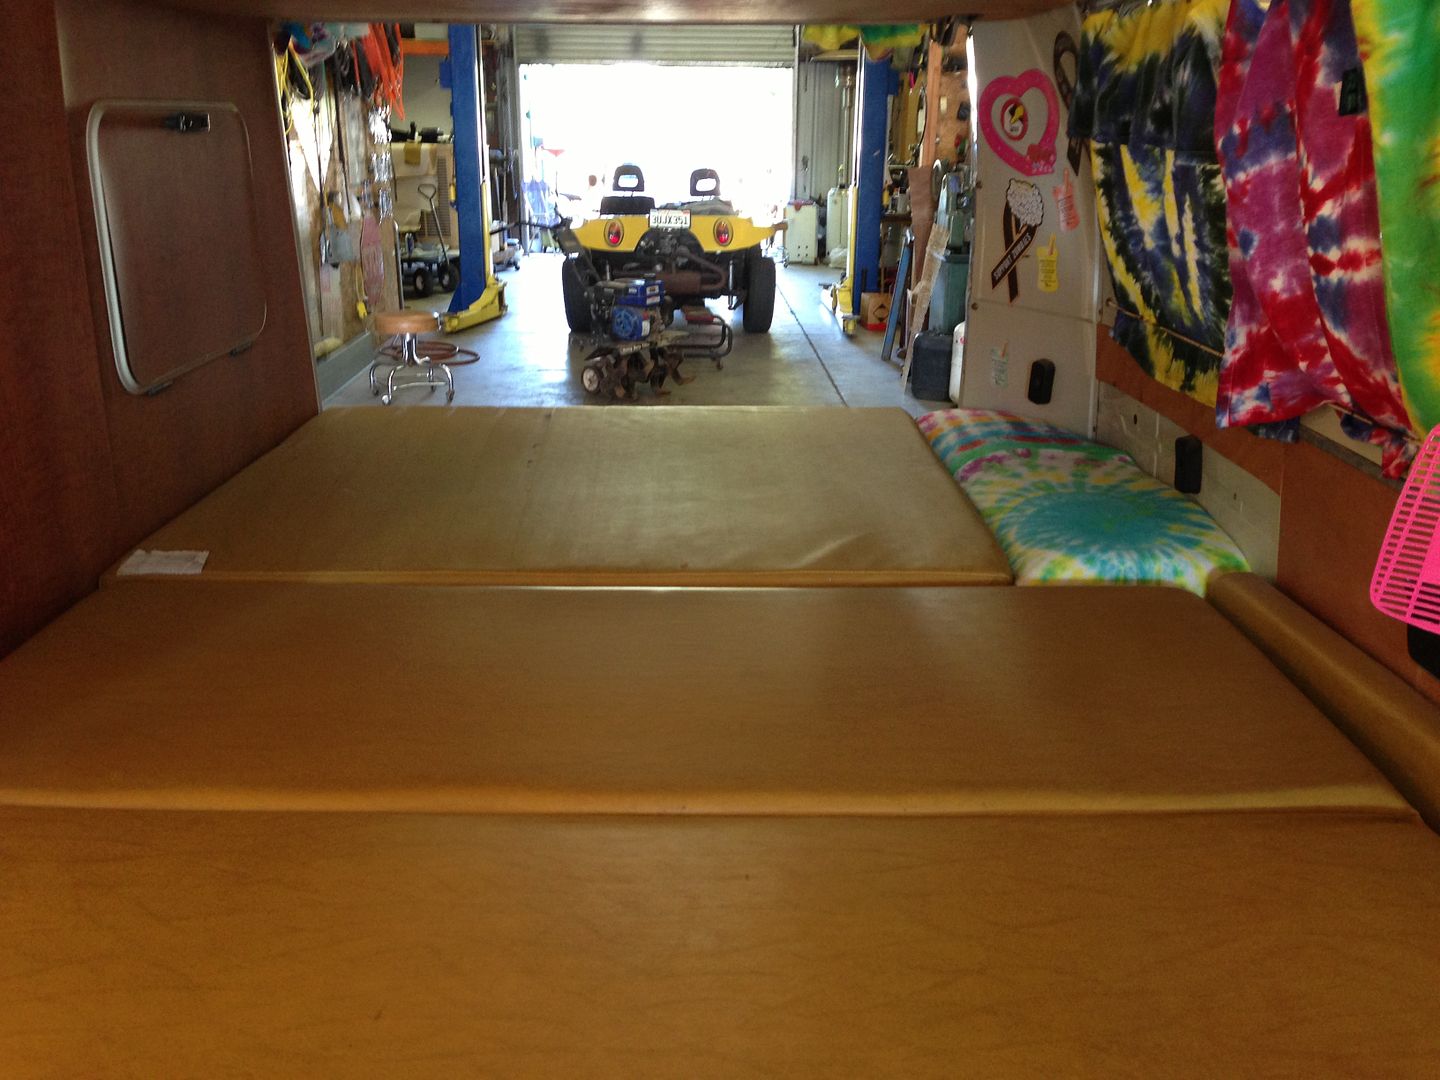 Also made a curtan for the slider. It's going to be held on with a couple magnets for right now. Eventually I will find the hangers that slide in the track. I had a couple packages of them but can't figure out where I put them. LOL  I'm all ready for camping now. | |
|
| | |
MoonMullins
Posts : 95
Join date : 2012-03-14
Location : Sacramento
| | Subject: Re: My 70 Bus!! Sat May 18, 2013 8:14 pm | |
| | |
|
| | |
justcruzin
Posts : 810
Join date : 2011-07-29
Location : Sacramento CA
| |
| | |
Breck

Posts : 814
Join date : 2012-01-12
Age : 111
Location : Citrus Heights
| | Subject: Re: My 70 Bus!! Sat Jun 15, 2013 1:38 am | |
| Oh you know I will be putting the cb in!! Call me "ob vw one" | |
|
| | |
Breck
Posts : 814
Join date : 2012-01-12
Age : 111
Location : Citrus Heights
| | Subject: Re: My 70 Bus!! Wed Jul 03, 2013 10:09 am | |
| Kim what do the three switches run on the left of the picture? | |
|
| | |
justcruzin
Posts : 810
Join date : 2011-07-29
Location : Sacramento CA
| | Subject: Re: My 70 Bus!! Wed Jul 03, 2013 2:22 pm | |
| If you mean the right of the picture, the blue one's? One is for the iPod/speakers. The other one runs the fan, and one is for charging the iPod or phone. I bought it in the hopes of being able to leave the main plug for it plugged into it's powerscource and then I would be able to just switch the switches on and off when needed. The only dumb thing about how they designed it, is that the main plug has a light also, so you can't just leave it plugged in all the time, specially at night as it will not only run the battery down eventually but it is a big bliboard at night saying "here I am" come steel my stuff!" LOL I need to take the main plug apart one day and take the bulb out. LOL Just been to lazy to tackle it. Maybe this next week I can get that done. I'm on vacation!! | |
|
| | |
justcruzin
Posts : 810
Join date : 2011-07-29
Location : Sacramento CA
| | Subject: Re: My 70 Bus!! Sat Jul 13, 2013 6:45 pm | |
| I have been wanting a 1776 for my bus for a while now. We decided to save some money and just pull the 1776 out of the 64 bus, put new oil cooler seals in it because it was leaking pretty bad, then put it in my bus. We would put hubby's "built" 1776 in the 64 since I didn't really drive that one that often. ( I don't like the built one because it doesn't want to idle with just one carb and hubby doesn't like dual carbs) So we pulled the 1776 out and after hubby cleaned it up, I did a little painting. Figured I would make it match the buses theme. 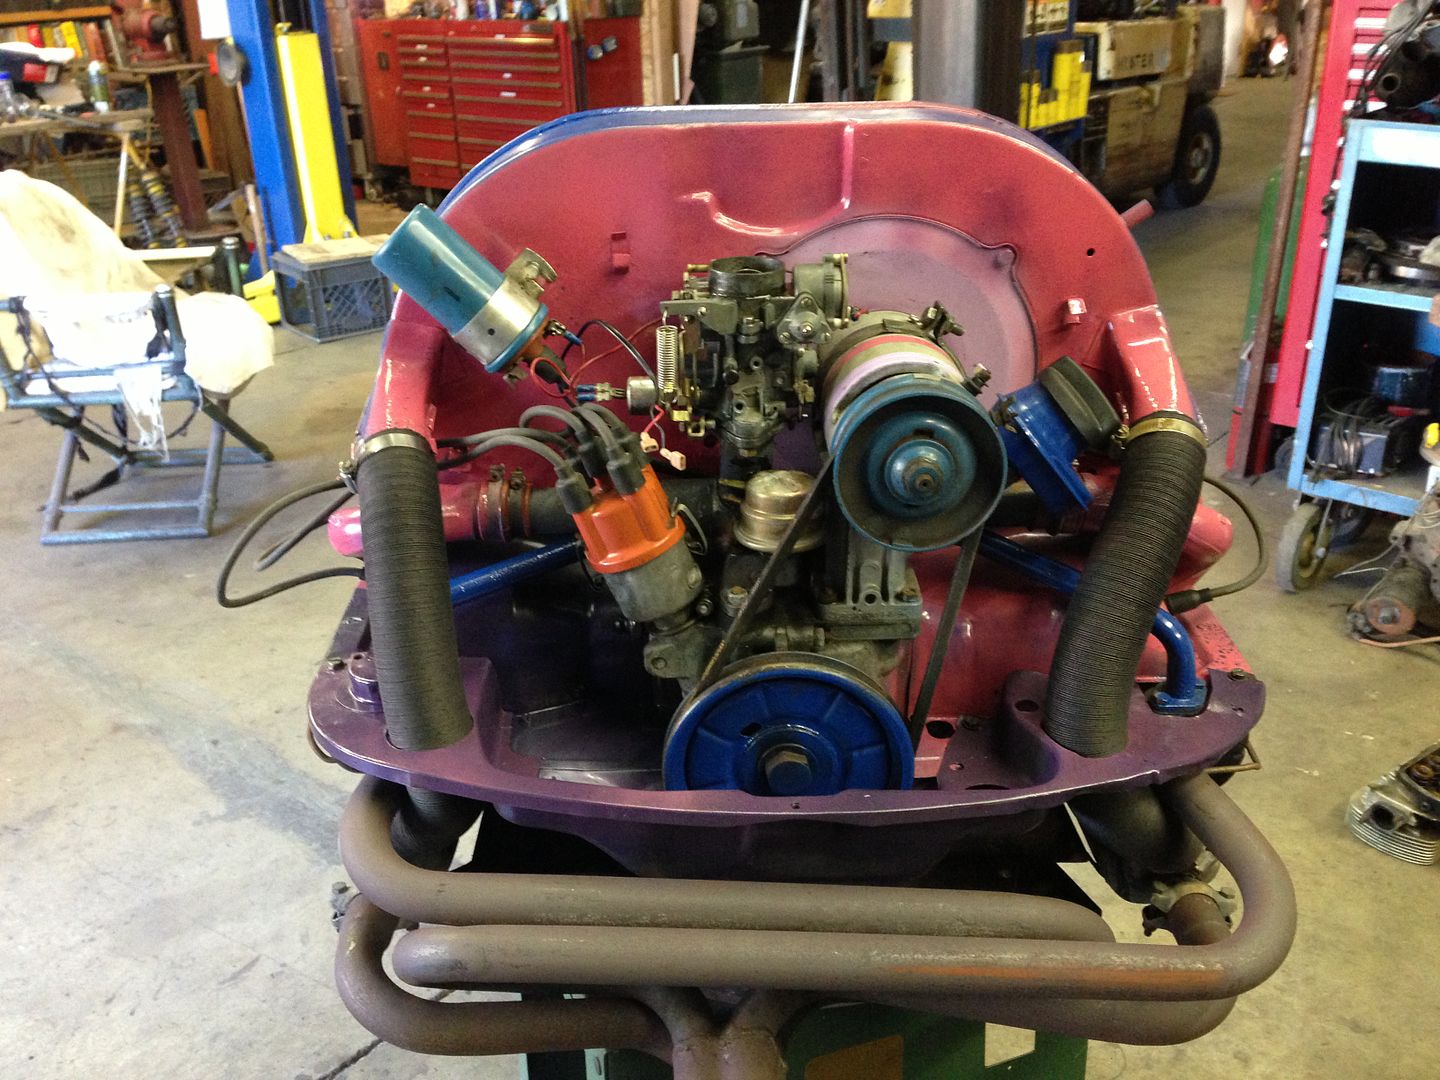 I then pulled the 1600 single port out. 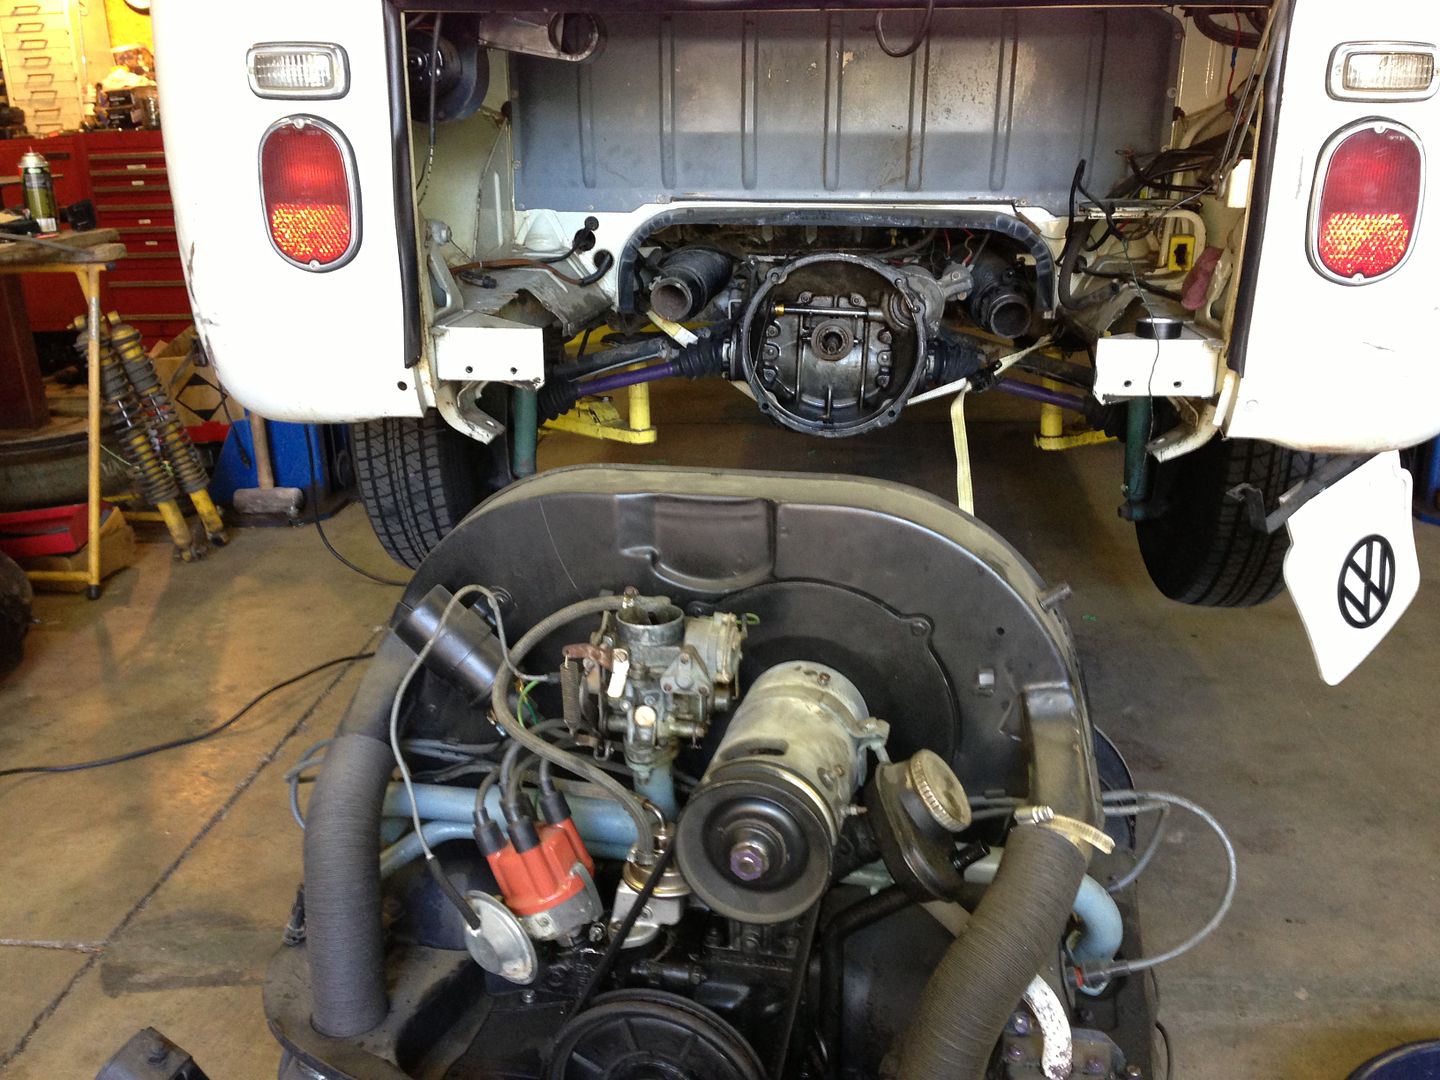 We had to get a new exhaust because we didn't want to run the bus muffler and the header that was on the 1776 was not to my liking. LOL I bought this one,  and had hubby do this to it. 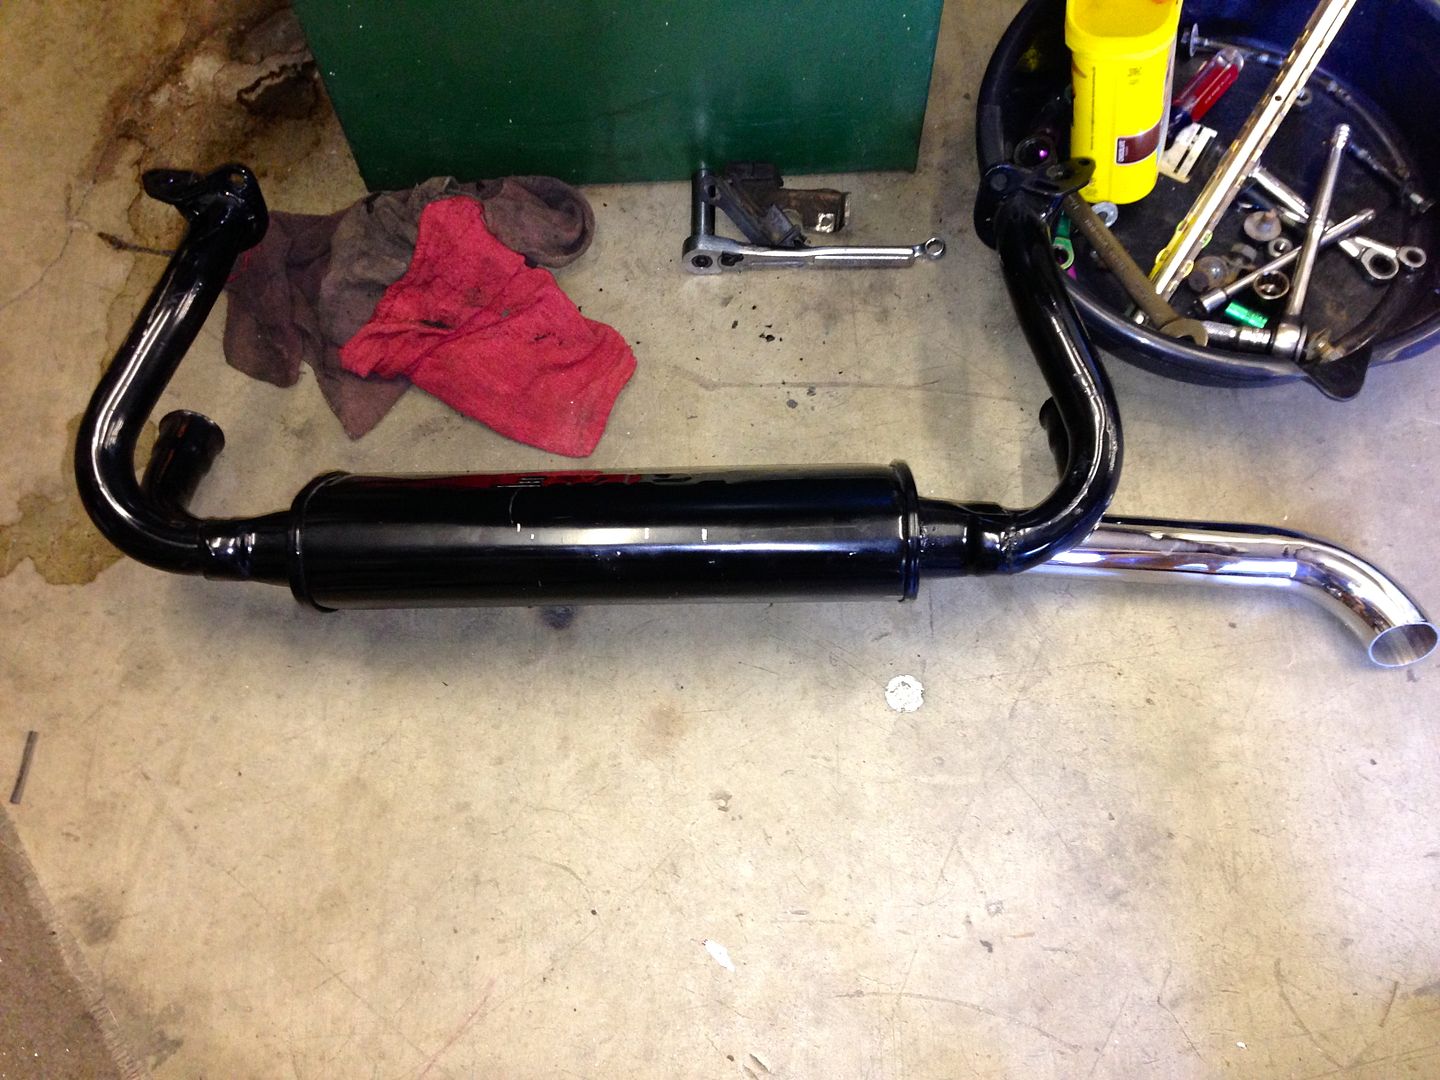 The pipe is actually still on the same side, the pic was just taken two different ways. I didn't like how the pipe came straight out the back so I had hubby cut it, turn it end for end, then weld it back on. It worked great. Here's just a neat shot (It thought it was neat. LOL) of the motor waiting to ge back in. 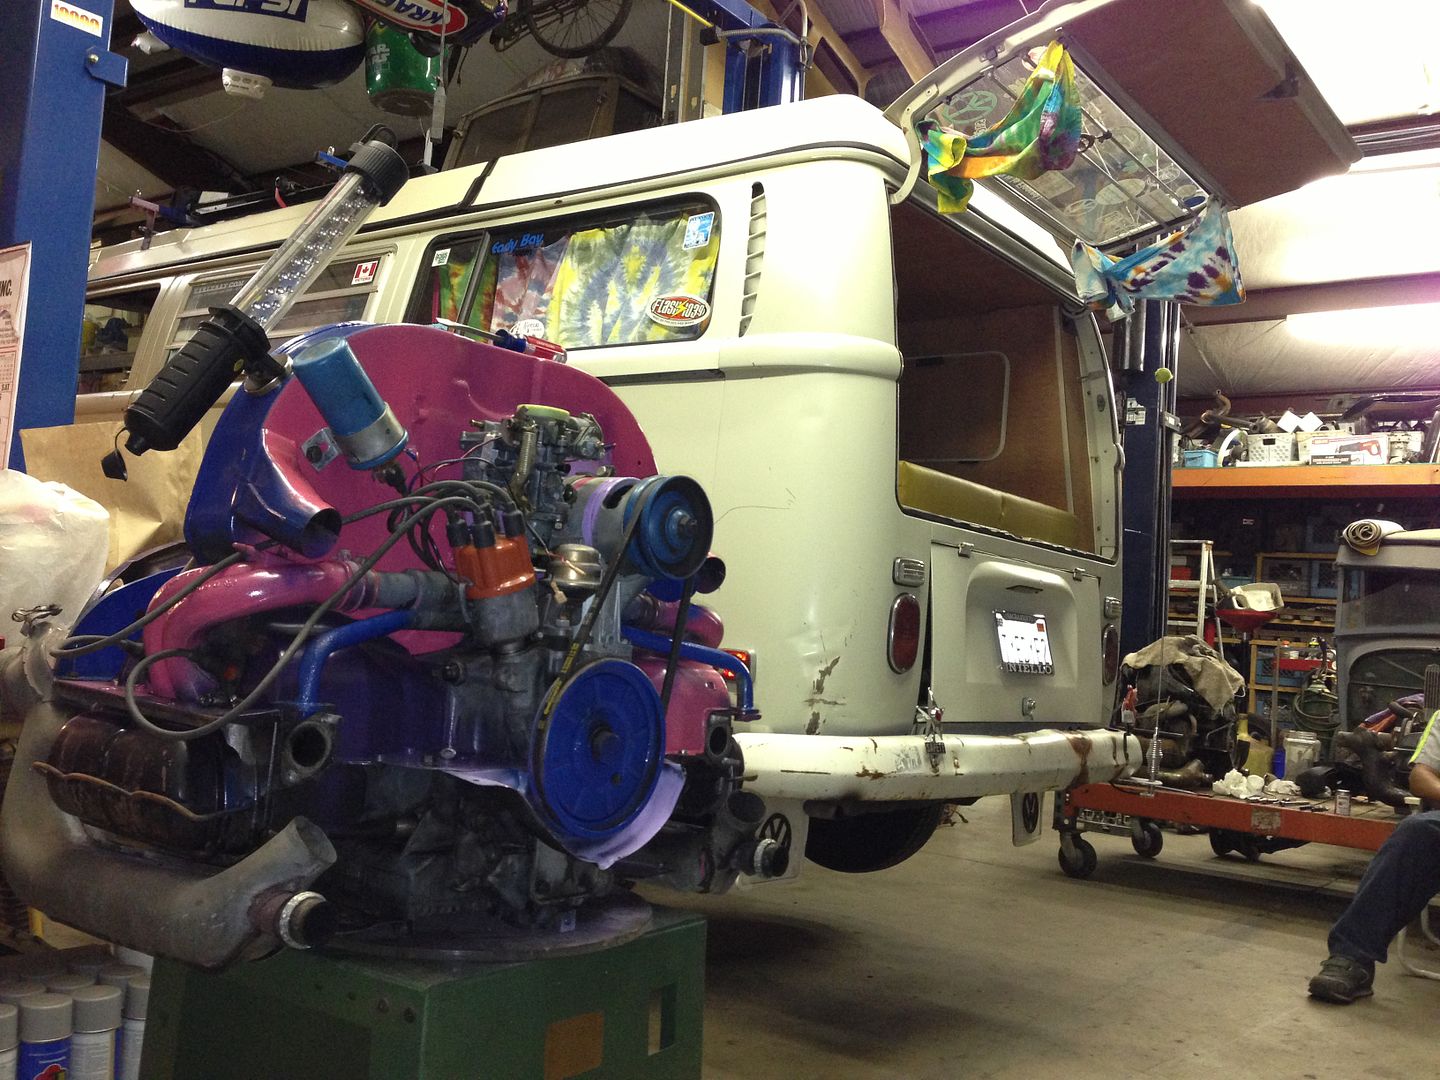 AFter the exhaust was done, we put it on and put the motor in the bus. 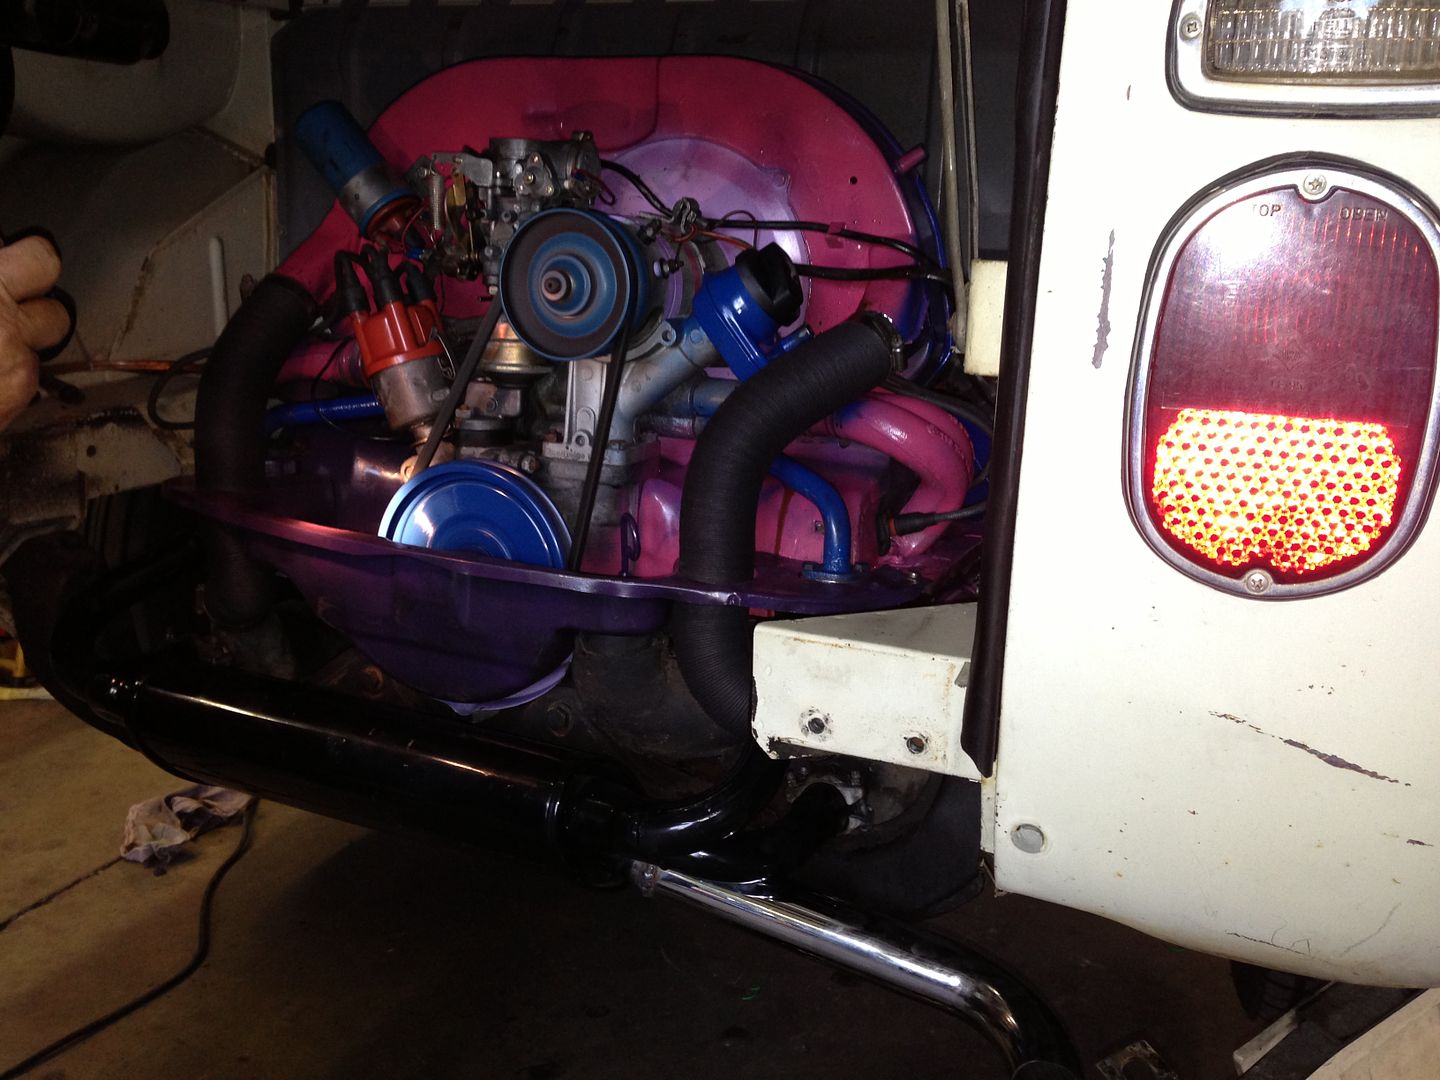 Then hubby told me to shut it down and tomorrow I could pull it back out. He thought I may have pinched an oil cooler seal because it was puking oil out of that area pretty bad. The next evening we put new seals in again and this time we ran the motor to check for leaks before putting the fan shroud back on. Still leaked. Pulled the oil cooler again and filed it smooth and then tried again. Still leaked. This time hubby was able to see that it wasn't coming from the oil cooler seals. It came from the case itself.  This motor is history. Bummer deal. I was so looking forward to having a 1776. He is going to see what he can do to salvage it, but for now I have to put a different motor in. We had gotten a 1600 dual port out of a burnt beetle that we bought not to long ago. Our friend Dewey went through it and put what it needed on it to get it running and was using it in his bus till we got his motor rebuilt. So we pulled it back out of his bus and went through the process of R&Ring some of his pieces and parts and putting my stuff back on it. Then we installed it in the bus. 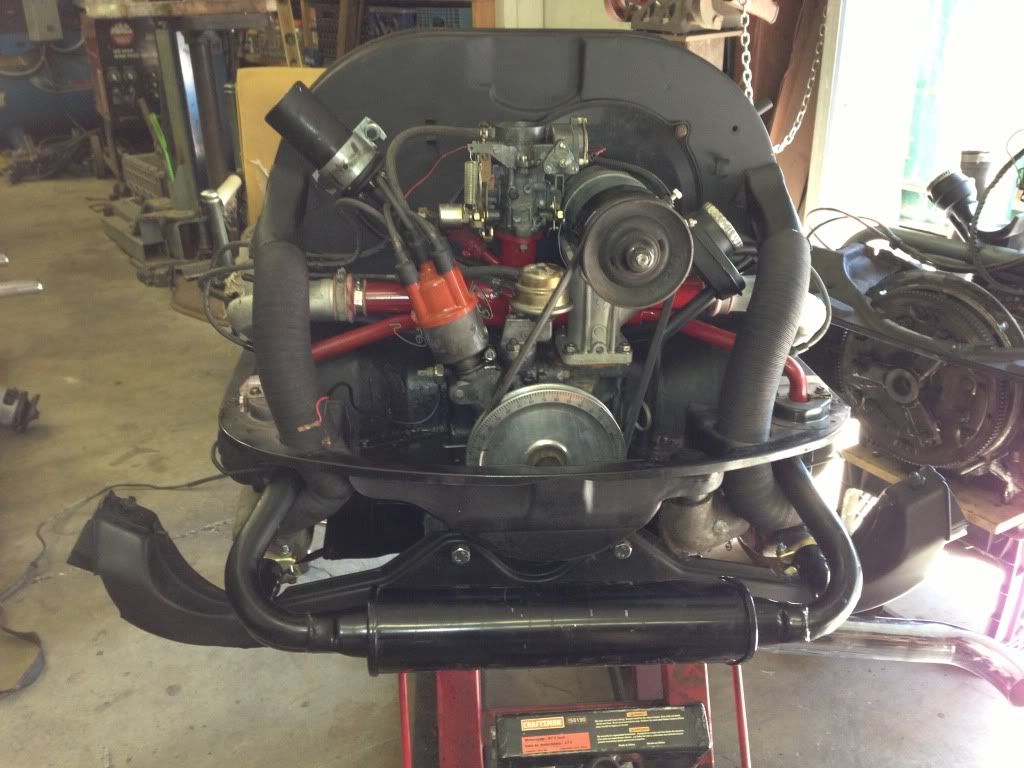 Not thrilled with the red intake but that is the color he painted it and I didn't want to pull it all apart to paint it a better color. It is a temporary motor anyway. I do still plan on putting a 1776 in it but for now this will do. Here is a shot of it all closed up. You can just see the tail pipe. It doesn't stick down too far, but yet just enough. It looks like it is hitting the mudflap in the pic but it doesn't. I like how it turned out and it sounds pretty good. I could have put the bus muffler back on this motor but decided to go with the new one since we bought it and modified it. Sounds pretty good too. Not to loud and not to quiet. 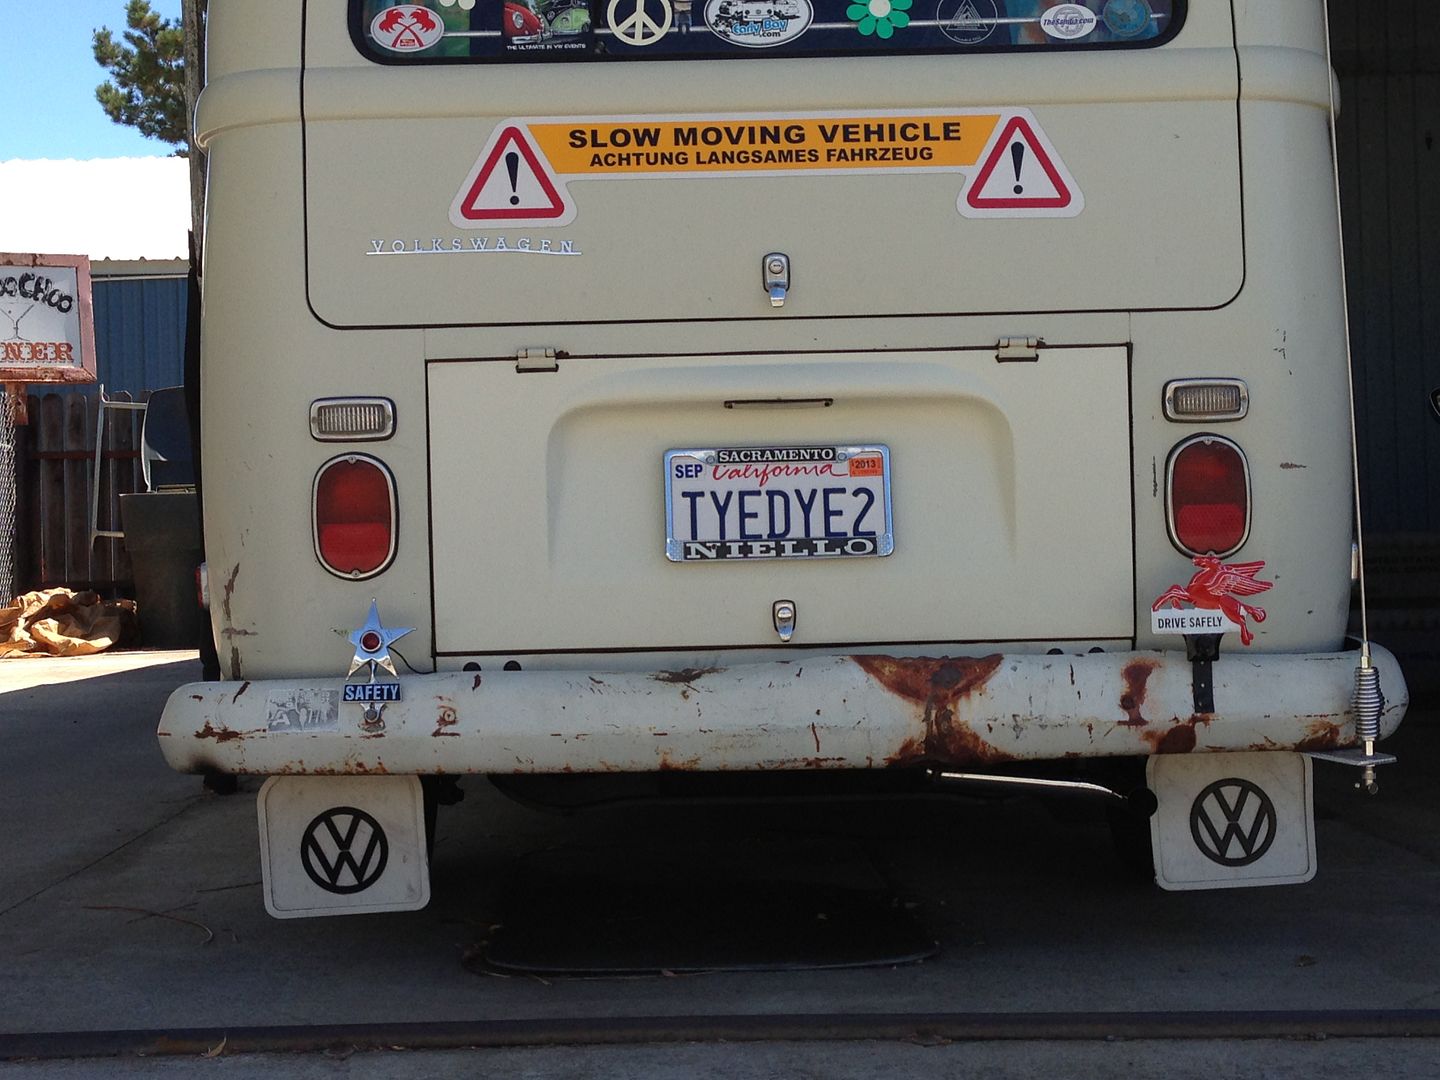 I can sure tell the difference from the single port and the dual port. I know I will miss the torque the single had in the take offs. Hope the torque in the top end of the dual port will win me over. It seems a bit more peppy on flat ground but the true test to see how much I will like it will be tomorrow night on the way to work. I have to climb a hill that normally puts me down to 45-50 mph. I sure hope this one will keep that speed or do a bit better. Time will tell. I also installed the new to me handle in my pop top. My original one's black cover shrunk and you could see the metal part of the handle. The new to me one is still in good shape.  Next on the list of things to do is the pop top canvas! | |
|
| | |
Breck
Posts : 814
Join date : 2012-01-12
Age : 111
Location : Citrus Heights
| | Subject: Re: My 70 Bus!! Sun Jul 14, 2013 12:48 am | |
| Bummer about the motor kim......... | |
|
| | |
silvertonguedevil
SacTown

Posts : 3101
Join date : 2011-01-13
Age : 47
Location : Seaside, Oregon....er, I mean California
| | Subject: Re: My 70 Bus!! Sun Jul 14, 2013 2:54 pm | |
| That's a colorful booger isn't it? | |
|
| | |
justcruzin
Posts : 810
Join date : 2011-07-29
Location : Sacramento CA
| | Subject: Re: My 70 Bus!! Mon Jul 22, 2013 3:09 pm | |
| | |
|
| | |
Breck
Posts : 814
Join date : 2012-01-12
Age : 111
Location : Citrus Heights
| | Subject: Re: My 70 Bus!! Mon Jul 22, 2013 7:01 pm | |
| Bummer on the mtr, nice lights tho | |
|
| | |
justcruzin
Posts : 810
Join date : 2011-07-29
Location : Sacramento CA
| | Subject: Re: My 70 Bus!! Tue Jul 23, 2013 2:54 pm | |
| Just an update on the idle problem. Sometimes it is the simplest things. A friend of ours came over and had a look at it and when he was starting to mess with the adjustments on the carb he discovered the fuel shut off wire wasn't hooked up to the coil. It was just barely hanging next to the connector so it was actually just barely making contact. He hooked that up correctly and then readjusted the carb and now the bus runs and idles great. Also, knock on wood, I drove it all over town this morning and so far, no oil leaks!!! | |
|
| | |
MoonMullins
Posts : 95
Join date : 2012-03-14
Location : Sacramento
| | Subject: Re: My 70 Bus!! Wed Jul 24, 2013 12:39 pm | |
| You need some more stuff on your bus. :-) | |
|
| | |
justcruzin
Posts : 810
Join date : 2011-07-29
Location : Sacramento CA
| | Subject: Re: My 70 Bus!! Wed Jul 24, 2013 1:58 pm | |
| I'm going to be taking the lights back off. The officer told me that any color light is not legal if you can see it from the front. So the lights are coming off. LOL I didn't get a ticket though, he was real nice. LOL I was 3 minutes late for work though. I figure if I can only run them in parking lots, what's the use in having them. | |
|
| | |
MoonMullins
Posts : 95
Join date : 2012-03-14
Location : Sacramento
| | Subject: Re: My 70 Bus!! Wed Jul 24, 2013 2:52 pm | |
| Kim got busted by the man! | |
|
| | |
justcruzin
Posts : 810
Join date : 2011-07-29
Location : Sacramento CA
| | Subject: Re: My 70 Bus!! Wed Jul 24, 2013 2:56 pm | |
| LOL, his lights lit up the ground and air. LOL | |
|
| | |
Sponsored content
| | Subject: Re: My 70 Bus!! | |
| |
|
| | |
| | My 70 Bus!! | |
|