Posts : 788 Join date : 2011-06-02 Age : 61 Location : Auburn
Subject: Hugo's engine build at the Magical Place (Vallero's Machine Shop) Thu Sep 22, 2011 1:57 pm
It's time to start a thread for Hugo. His big sister, Velvet, has been getting all the attention lately.
Hugo's motor that Ray Vallero built in 1983 is now in Velvet, the bus. I always wanted one that was a "little faster"... Ray Vallero does not deal with grey areas when it comes to building motors. We have replanned this engine so many times, my head is spinning. Nevertheless, we are under a big push to take the car to the Fontana SoCal Bugorama in a few weeks and we're just going to "git 'er done". We can always change things later.
We've settled on 78mm crank, 94mm pistons... more info later.
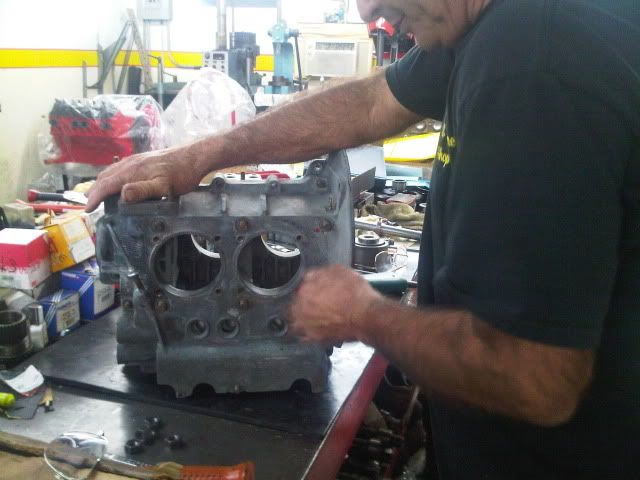
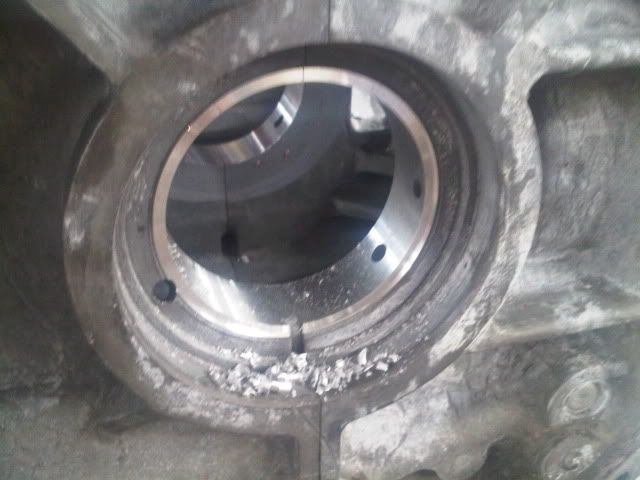
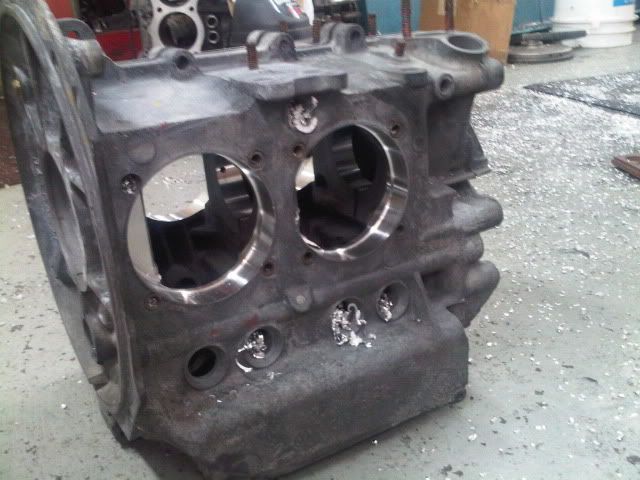
Here's what we're starting with, a late model case. An AS21 alloy case has some very high quality properties, compared to an AS41 (earlier cases). Note the Auto Union logo indicating it was after VW and Audi merged. However, it is not an indicator of authenticity, aftermarket cases also still use the logo.
Another feature besides better alloy on the later case is the 2nd drain. VW added this drain as a response to warranty claims on the flywheel seal leaking. At rest, the oil level was higher with only one drain and would pool in the case. There was no silicone yet, early seals were made from neoprene, which hardens with heat. So they added a 2nd drain to solve this, better design.
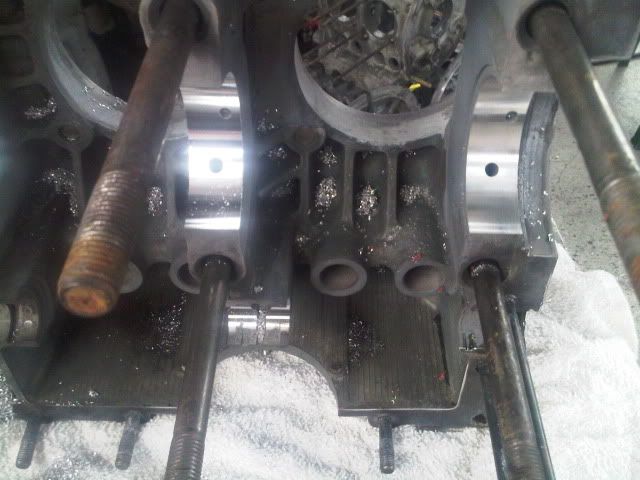
So, a little about line boring vs. align bore. Have you ever wondered what the correct term is? An align bore is the correct term for V8's and such, because you align the front to the back when boring the case. But, VW cases are never in line front to back, so you cannot align bore a VW typically (not without running in to off center cranks, other issues). So, in VW's you are Line Boring, borning the case in a straight line front to back.
Line bore and cam bore done:
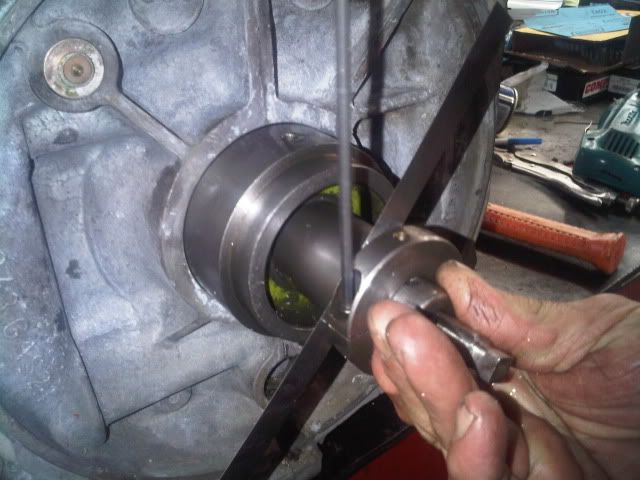
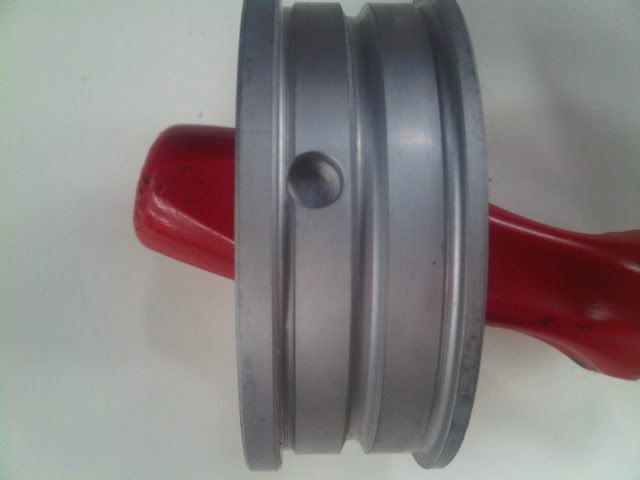
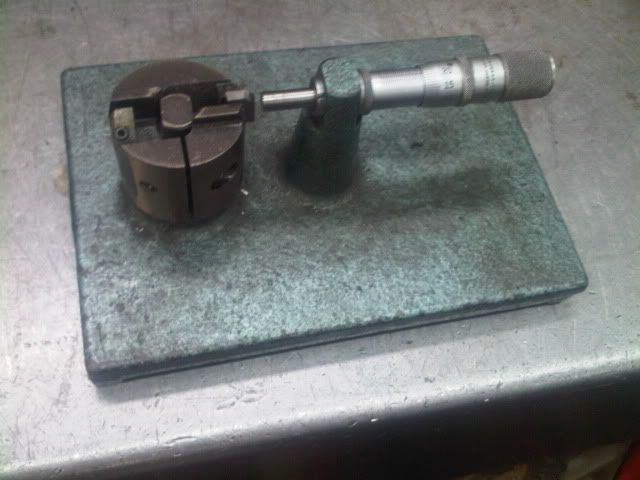
Preparation for flycutting the case for the front thrust bearing. This is done to clean up the thrust surface at a minimal amount, only until it cleans all the way across. Others usually cut the case to suit the bearing, then you only get two shots, first and 2nd ovesized bearings. Ray only takes a minimal amount off the case and makes the bearing fit so precise that the case can be reused many times. There will be no wear.
Using the Porta-tool gives Ray the abilty to do it this way. The basic part against the case is stationary, then there's a feeler gauge at .004-.006 to make it a minimal cut, then remove the gauge, and the outside part will cut to the width of the gap. There's probably a more "mechanical" way to describe this to you guys, but I'm a girl. I tell it like I see it.
Done:
We measure the case after it is flycut for the thrust bearing. We are now cutting the main bearing .046. A standard bearing is one size, with the flange is the same size on each end. A first oversize (for rebuilds) is .020 smaller in the center (edge is wider), and a 2nd oversize is .040. I know all you motorheads know this, but I am explaining it for all us girls out there....
When the case requires thrustcutting, routinely the case is cut to fit the oversized bearing, as I explained above. Its harder to get a precise fit by cutting the case, so therefore Ray flycuts the front main thrust bearing. This bearing is double oversized, it wasn't necessarily needed to be 2x, but we didn't have a first oversized on hand and we were custom cutting it anyways.
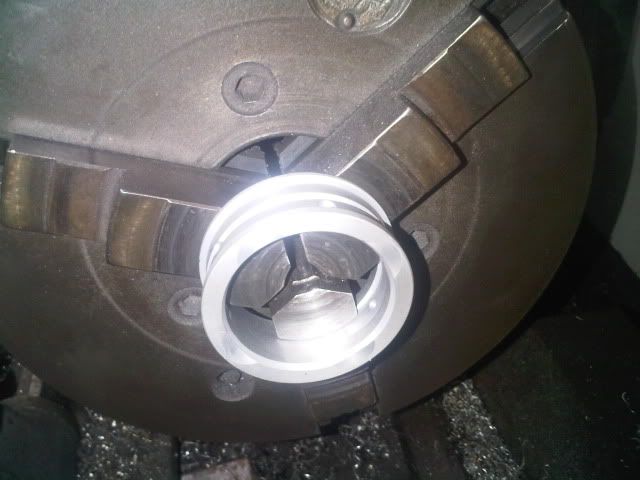
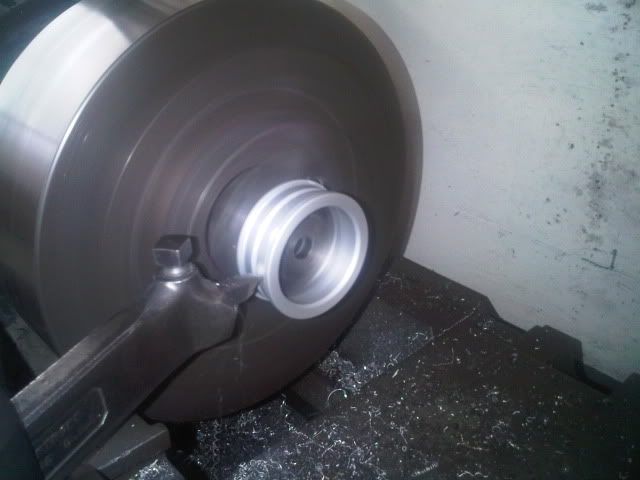
This chuck was custom ground by Ray because the arc of a standard one this size would bite the inside of a VW bearing and damage it slightly. This chuck fits VW bearings precisely on the inside, in case he needs to put the bearing back on lathe multiple times.
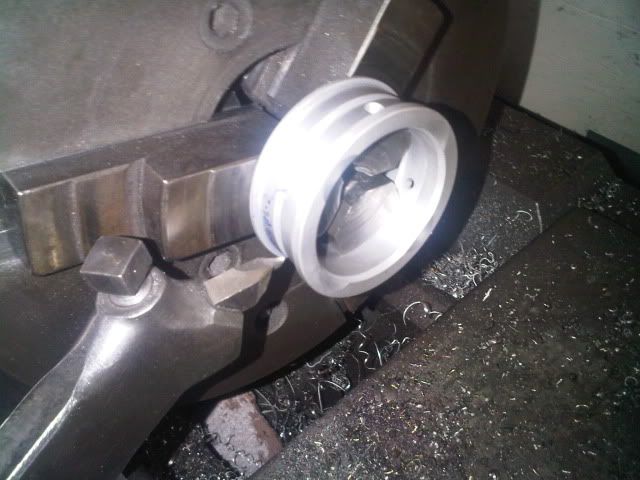
Lathe bit on the fixture cutting the bearing on the custom chuck:
Nice and tight, there will be no wear on this. Just one of the many reasons that Hugo's old engine is still strong after 28 years of daily driving.
type 4 State Route
Posts : 2601 Join date : 2010-08-31 Age : 63 Location : Penn Valley
Subject: Re: Hugo's engine build at the Magical Place (Vallero's Machine Shop) Thu Sep 22, 2011 2:05 pm
Now that is some art
dsimas
Posts : 788 Join date : 2011-06-02 Age : 61 Location : Auburn
Subject: Re: Hugo's engine build at the Magical Place (Vallero's Machine Shop) Fri Sep 23, 2011 3:17 pm
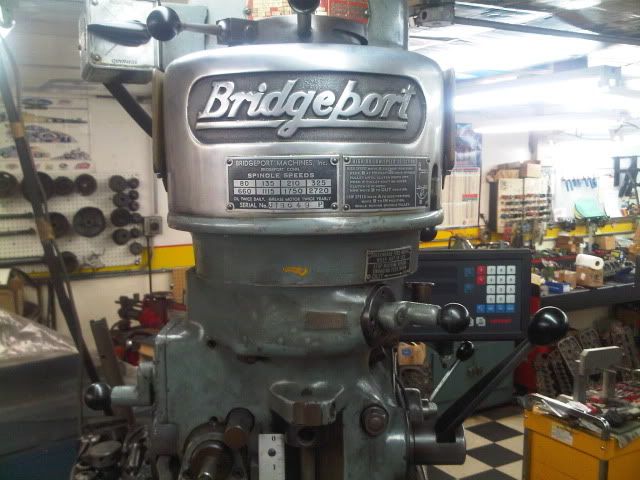
Now, off to the Bridgeport!
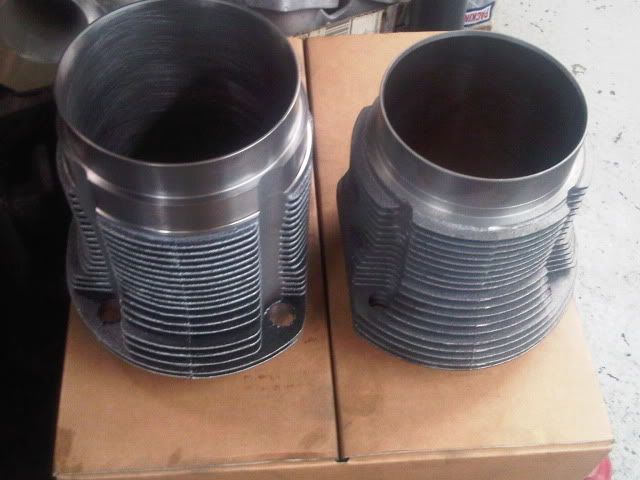
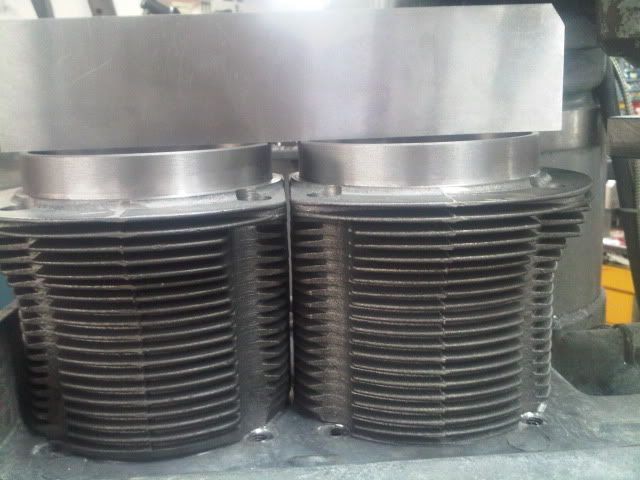
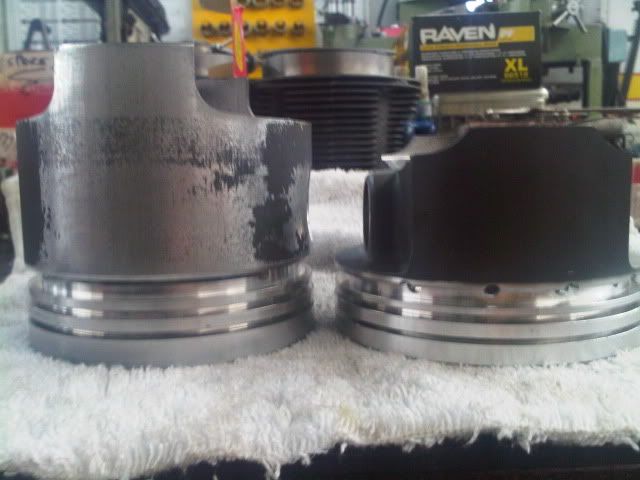
Here's my barrel on the left, compared to a stock on on the right.
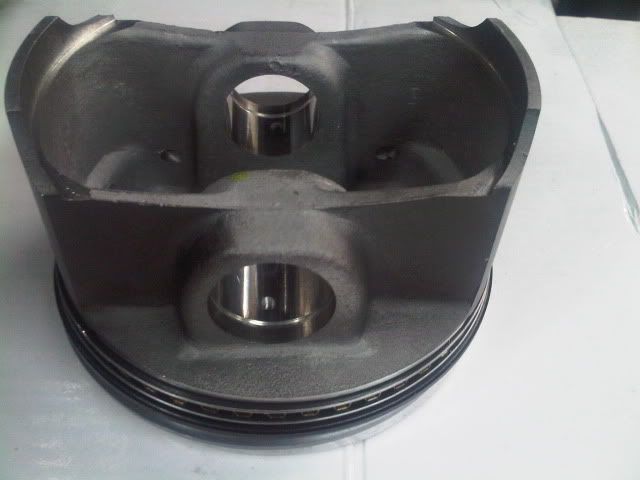
And my pistons, but more on these later...
Ray built the heavy duty base for this, with holes in it to accomodate the studs in the case.
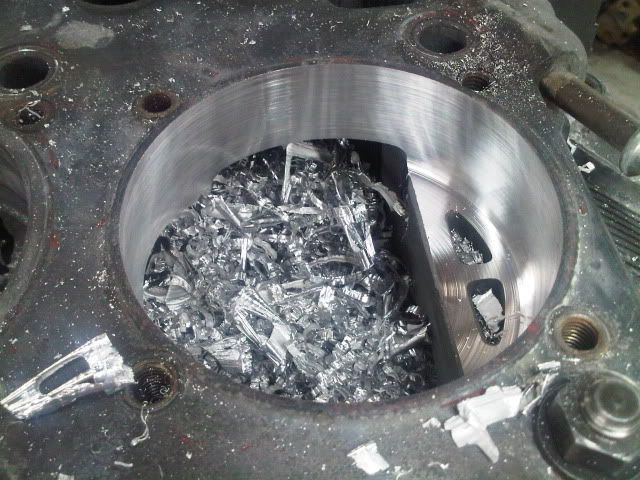
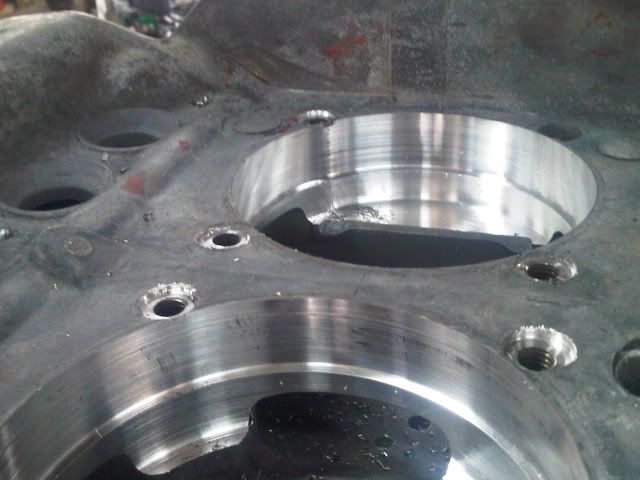
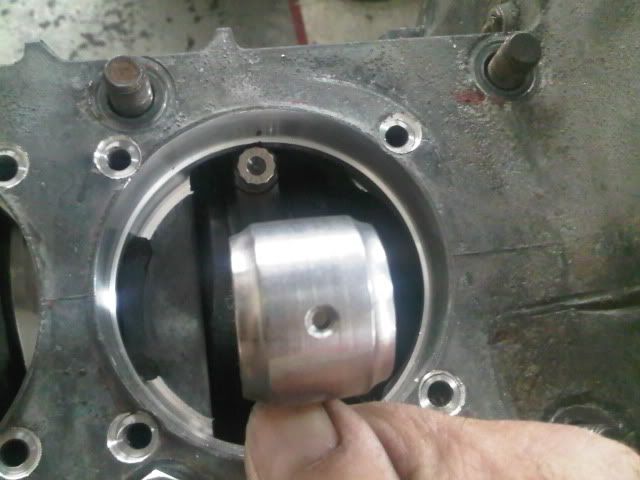
Centering the hole for a 94mm bore.
Done in two stages for a step up, one for the piston and one for the cylinder. Many people bore the hole without a step, but Ray likes to leave more material there for strength integrity.
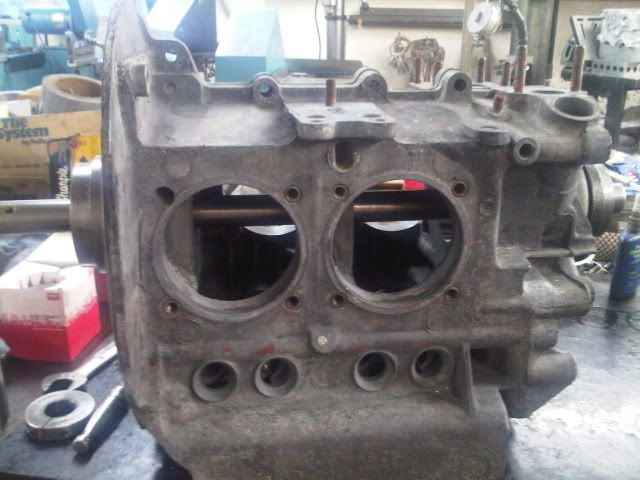
First pass:
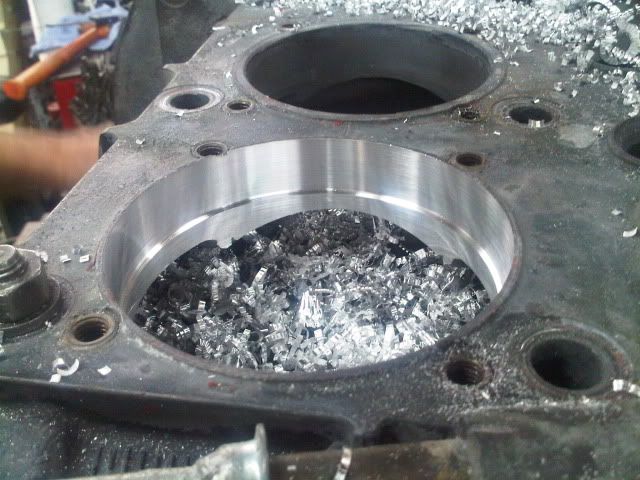
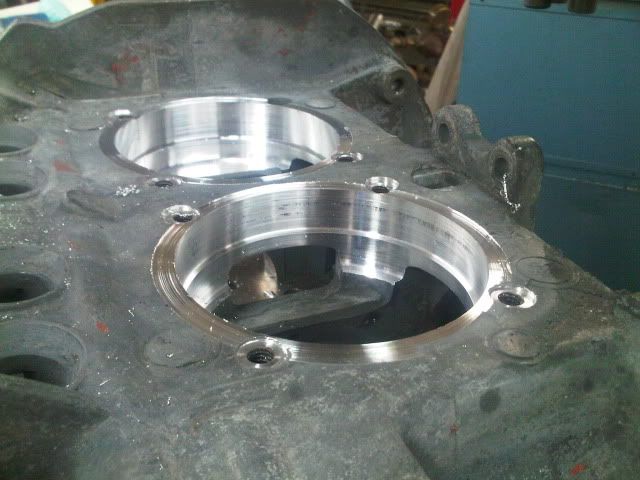
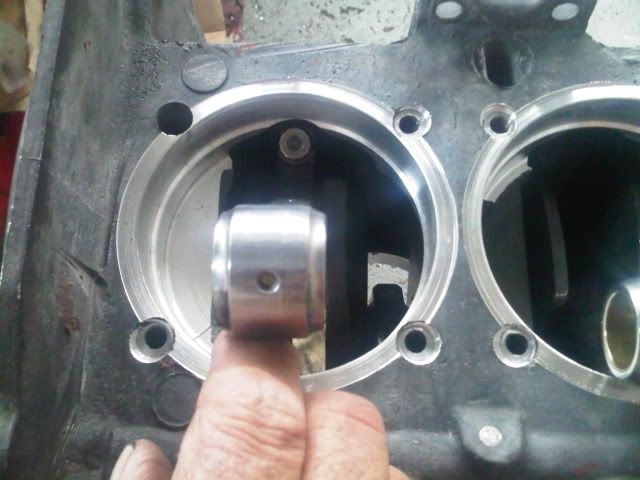
Second pass, now showing the step:
All done. Next is to remove the plugs in this case....
type 4 State Route
Posts : 2601 Join date : 2010-08-31 Age : 63 Location : Penn Valley
Subject: Re: Hugo's engine build at the Magical Place (Vallero's Machine Shop) Fri Sep 23, 2011 5:41 pm
Nice pistons, they dont look right.
Looks great
Last edited by type 4 on Wed Sep 28, 2011 11:57 am; edited 1 time in total
60herbie53 State Route
Posts : 2879 Join date : 2011-01-12 Age : 63 Location : Higgins Corner
Subject: Re: Hugo's engine build at the Magical Place (Vallero's Machine Shop) Fri Sep 23, 2011 8:55 pm
Ray sure does nice work. Looking good.
type 4 State Route
Posts : 2601 Join date : 2010-08-31 Age : 63 Location : Penn Valley
Subject: Re: Hugo's engine build at the Magical Place (Vallero's Machine Shop) Fri Sep 23, 2011 9:20 pm
The 914 is running 104mm
60herbie53 State Route
Posts : 2879 Join date : 2011-01-12 Age : 63 Location : Higgins Corner
Subject: Re: Hugo's engine build at the Magical Place (Vallero's Machine Shop) Fri Sep 23, 2011 9:24 pm
This isn't about your 914.
type 4 State Route
Posts : 2601 Join date : 2010-08-31 Age : 63 Location : Penn Valley
Subject: Re: Hugo's engine build at the Magical Place (Vallero's Machine Shop) Fri Sep 23, 2011 9:40 pm
Sorry
60herbie53 State Route
Posts : 2879 Join date : 2011-01-12 Age : 63 Location : Higgins Corner
Subject: Re: Hugo's engine build at the Magical Place (Vallero's Machine Shop) Fri Sep 23, 2011 10:38 pm
Is that as large as the bore on that case can go Dawn?
dsimas
Posts : 788 Join date : 2011-06-02 Age : 61 Location : Auburn
Subject: Re: Hugo's engine build at the Magical Place (Vallero's Machine Shop) Sun Sep 25, 2011 1:04 pm
60herbie53 wrote:
Is that as large as the bore on that case can go Dawn?
You CAN go to 96mm in special applications, not practical or cost effective and the case would lose some integrity. Actually, you COULD go to 98, but only in a new case with no inserts. The stud inserts are steel and they would be in the way of that large of a bore.
60herbie53 State Route
Posts : 2879 Join date : 2011-01-12 Age : 63 Location : Higgins Corner
Subject: Re: Hugo's engine build at the Magical Place (Vallero's Machine Shop) Sun Sep 25, 2011 1:13 pm
Okay. So for daily driver reliability you guys are right there.
dsimas
Posts : 788 Join date : 2011-06-02 Age : 61 Location : Auburn
Subject: Re: Hugo's engine build at the Magical Place (Vallero's Machine Shop) Sun Sep 25, 2011 3:51 pm
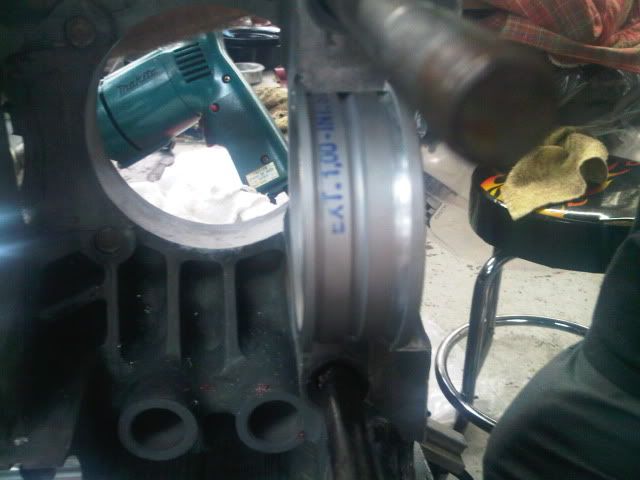
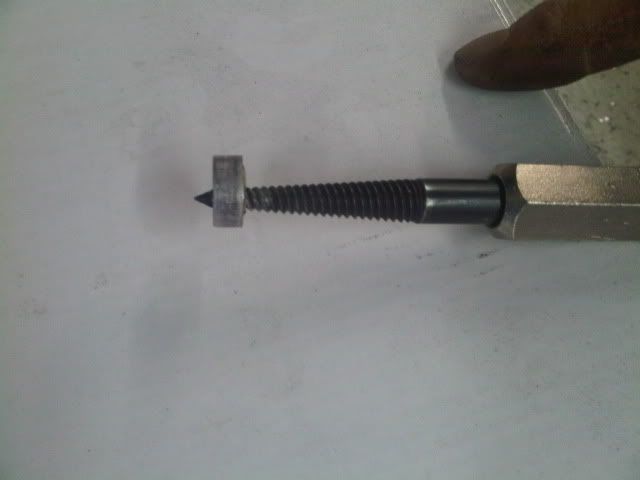
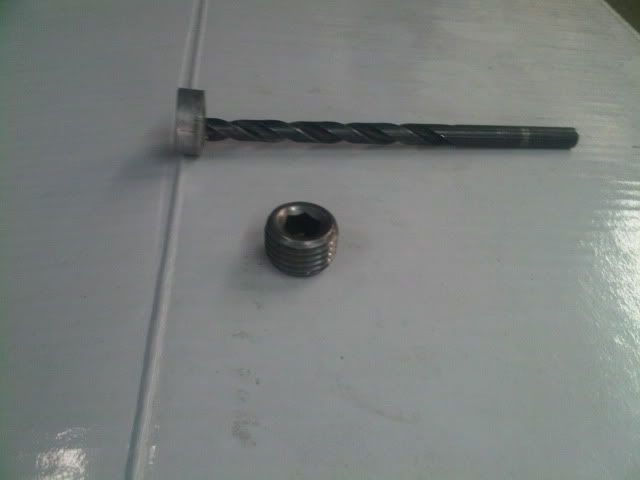
Ray drilled out the old press-in plugs and replaced with threaded plugs, which are impossible to blow out.
New threaded one:
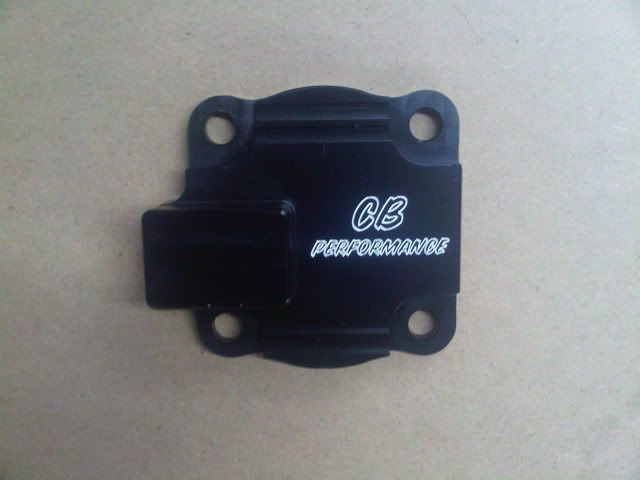
There is no reason to use a stock sized oil pump since our motor won't leak internally. A smaller pump uses less energy (HP). A stock engine is designed to have a minimum clearance of .003, we are staying within .0015. Things we've improved on are: The main bearing is tighter, the rod bearings, the oil galleys are plugged and rerouted, and the end play in the pump is minimized by shaving down the cover. All of these things allow internal leakage in a stock engine, creating more of a need for a large pump; in ours everything is on the low side of tolerance.
Difference in pump and gears, and a picture of the cover:
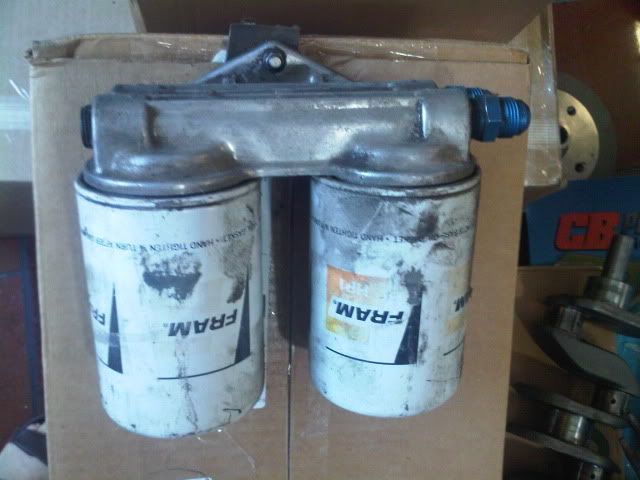
We are going to have an external 96-pass oil cooler and two oil filters off of Ray's old porche-body racecar (the only original part that will "live again" ). Two filters carry less pressure.
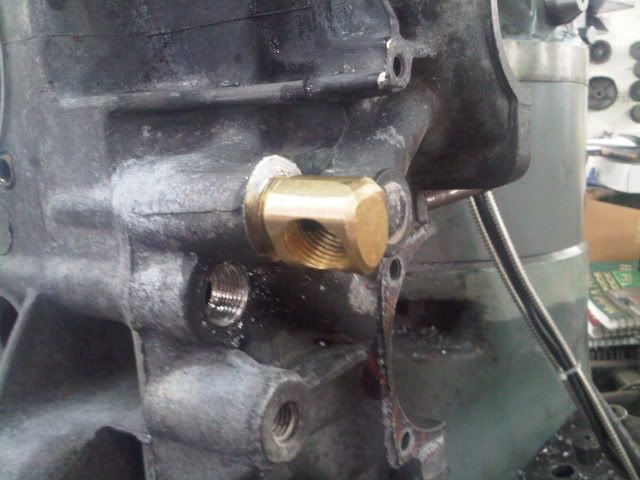
The original inlet and outlet for oil into the pump are both blocked with threaded plugs. Many people only block the pump hole, but not the case's (or vice versa), which can cause an oil warning light at idle.
Then a 90-degree brass fitting is installed on the case. It is ground down for a tighter package, more clearance behind the pulley so we don't have modify the sheet metal.
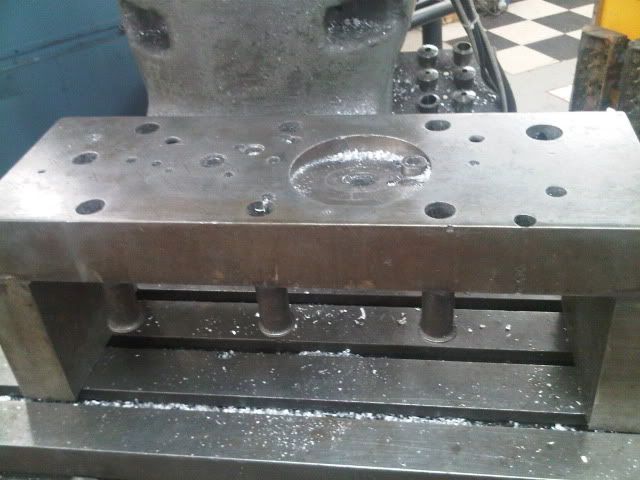
Back to the Bridgeport. This is a better look at the fixture that Ray made 30 years ago, especially for VW's.
He is now going to top these old steel stud inserts so they won't shatter when we flycut the deck.
Before:
After:
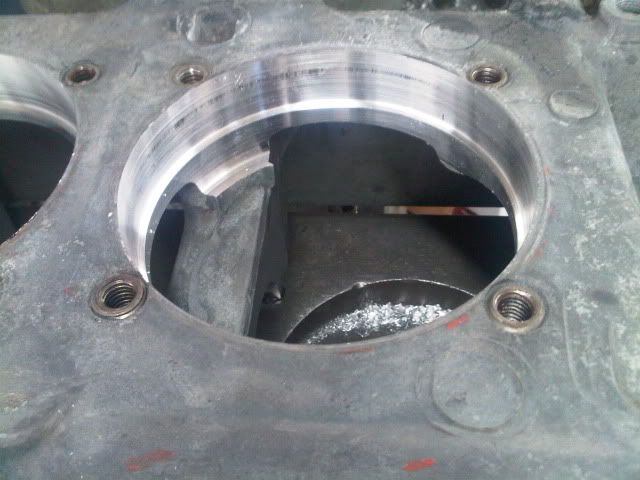
In the picture above, you may notice (barely can see them) a notch in the edge of the holes at the inserts because they are so close. Some people would worry that this will leak. It will not. Many people use improper sealer for barrels and these would leak. Ray uses Ultra Grey sealer, which has a high silicone content. Not like normal sealers, it sets up harder. With softer sealers you can pull the barrels right off the case, not so with Ultra Grey. If sealed properly, these notches are too high to cause a leak.
Now he is going to flycut the deck so that the barrel has more surface area to sit on (rather than on the raised spigot edge), and so they will not move over time (longevity). The reason that he did not do this at the same time he bored the holes is that we are building a narrow motor. And therefore, are not going to be using spacers on the cylinders to make them fit. The deck height needed to be determined first, so we must know where the pistons are in the bore first. We installed the pistons and cylinders and then check the deck height. Only then do we know how much to cut the case. This is important if you are not going to use shims to make up the difference, if you over cut. This build is different than most, we have 82 stroke pistons with a 78 crank, so the deck plays a big role in what is needed to be cut from the deck.
The radius on a barrel is not a 90-degree angle. So he files down the new sharp deck edge.
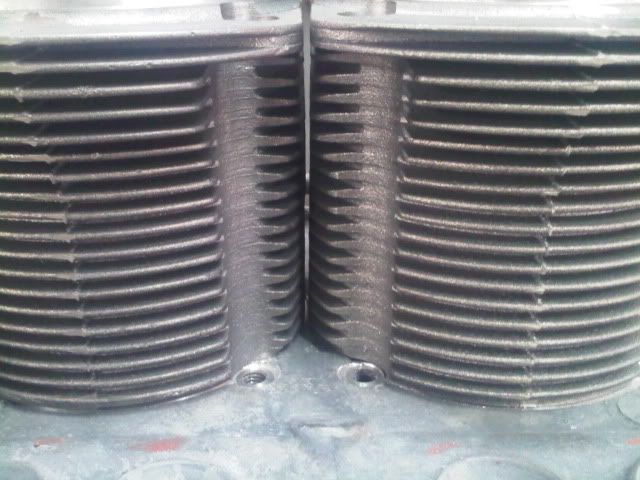
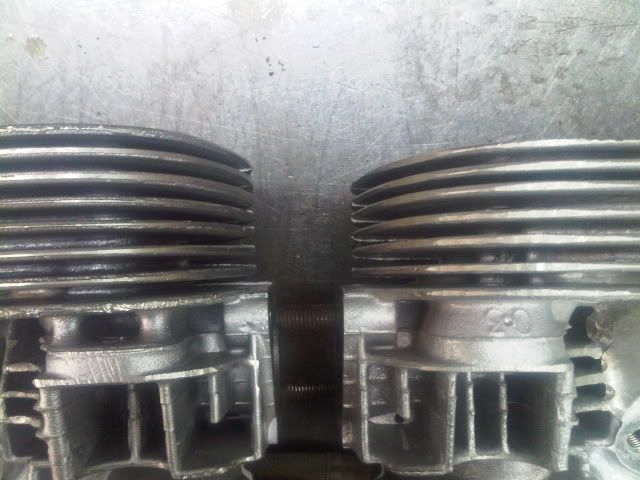
Now, putting the cylinders in, they rock a little. They need trimming to sit down solid.
And they are touching at the bottom a bit.
So Ray ground them down on the bottom edge to sit flat, and on the fins to not touch.
Now they are tight, not touching, and need to check that they are exactly the same height. Checking is important or else the heads will leak. Once all this is done, each cylinder is specifically matched to that hole, as they are all modified a bit to match one another, so he numbers them with a pen.
Next update we will be assembling the motor to see some clearances! Looking forward to seeing the whole package.
silvertonguedevil SacTown
Posts : 3101 Join date : 2011-01-13 Age : 47 Location : Seaside, Oregon....er, I mean California
Subject: Re: Hugo's engine build at the Magical Place (Vallero's Machine Shop) Sun Sep 25, 2011 4:14 pm
It's "art"!!
Thank you so much for this thread.
Guest Guest
Subject: Re: Hugo's engine build at the Magical Place (Vallero's Machine Shop) Sun Sep 25, 2011 5:41 pm
WOW!
60herbie53 State Route
Posts : 2879 Join date : 2011-01-12 Age : 63 Location : Higgins Corner
Subject: Re: Hugo's engine build at the Magical Place (Vallero's Machine Shop) Sun Sep 25, 2011 11:10 pm
That is beyond top notch work. It is perfection.
rayvallero
Posts : 147 Join date : 2011-06-05 Location : Auburn
Subject: Re: Hugo's engine build at the Magical Place (Vallero's Machine Shop) Mon Sep 26, 2011 1:33 am
GOOD job dawn...
dsimas
Posts : 788 Join date : 2011-06-02 Age : 61 Location : Auburn
Subject: Re: Hugo's engine build at the Magical Place (Vallero's Machine Shop) Mon Sep 26, 2011 1:12 pm
rayvallero wrote:
GOOD job dawn...
Me? You are doing most all the work. You are probably glad it's 8-5pm right now, so you can get some rest.
Last edited by dsimas on Mon Sep 26, 2011 5:20 pm; edited 1 time in total
rayvallero
Posts : 147 Join date : 2011-06-05 Location : Auburn
Subject: Re: Hugo's engine build at the Magical Place (Vallero's Machine Shop) Mon Sep 26, 2011 3:41 pm
IT'S for you, NOT work. IT just has to happen. thats all
dsimas
Posts : 788 Join date : 2011-06-02 Age : 61 Location : Auburn
Subject: Re: Hugo's engine build at the Magical Place (Vallero's Machine Shop) Mon Sep 26, 2011 5:20 pm
Hey, get off the computer and get to work.
Errr, I guess I only get to crack the whip when it's after 5pm...
dsimas
Posts : 788 Join date : 2011-06-02 Age : 61 Location : Auburn
Subject: Re: Hugo's engine build at the Magical Place (Vallero's Machine Shop) Tue Sep 27, 2011 3:06 pm
Okay, boys and girls, I am behind on this.
The cylinder is hitting the nut on the deck, so Ray had to grind this to clear.
We put the short block together in order to check clearances. The rod bolt is hitting.
Took it apart, ground them, now it clears (this is a different one obviously).
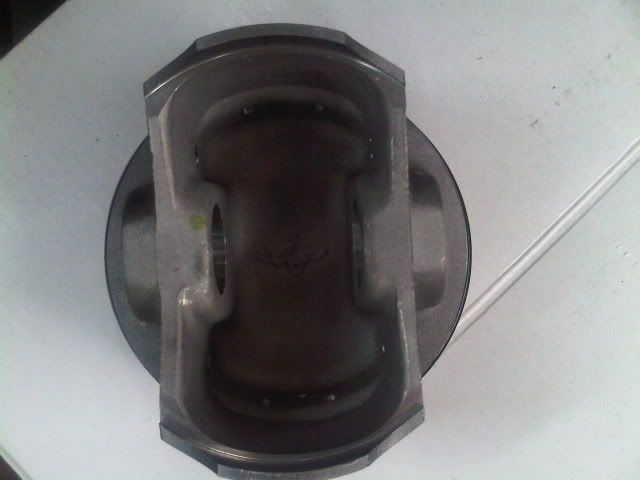
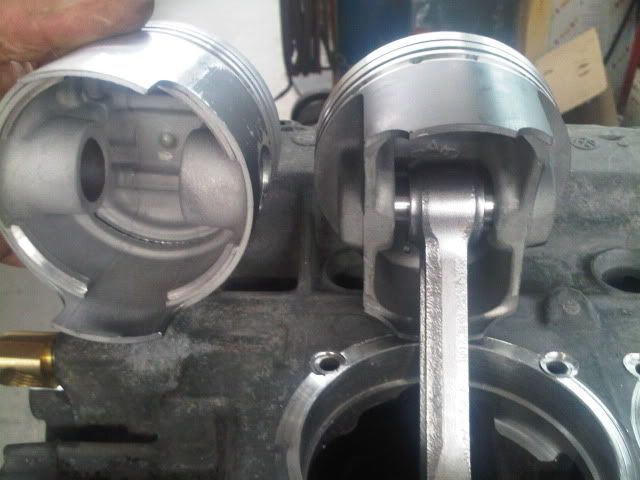
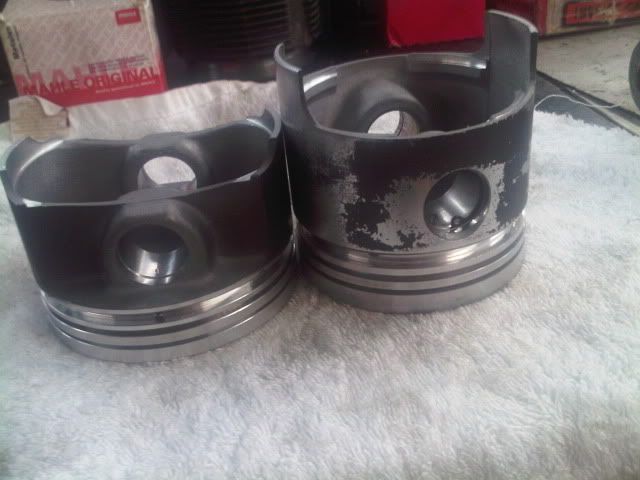
Now a little about my racing pistons, compared to stock (on left). The one on the right is a slipper skirt piston, it has a narrower cross section at the wrist pin to be lighter. The stock one pulls on wrist pin bosses instead of the skirt. The racing one pulls on the skirt and the bosses.
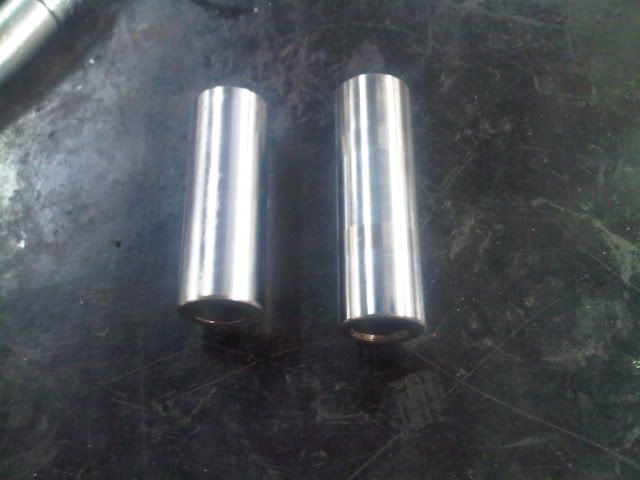
Wrist pin on my 94mm on left. Normal pin (88mm) on right.
The racing piston has oil return holes instead of a slot, which is stronger.
Stock pistons are designed for less clearance. The racing piston has a flared skirt, the stock one is straight (see the photo below, the one on the left is touching the one on the right at the top of the skirt). The stock one's skirt does not grow with heat due to the fact that there's an oil slot cut clear through the piston, which allows the head to grow without the skirt following.
This shows that it's smaller at the top. This is only when it's cold, once it warms up and swells it will fit tight, within a few seconds.
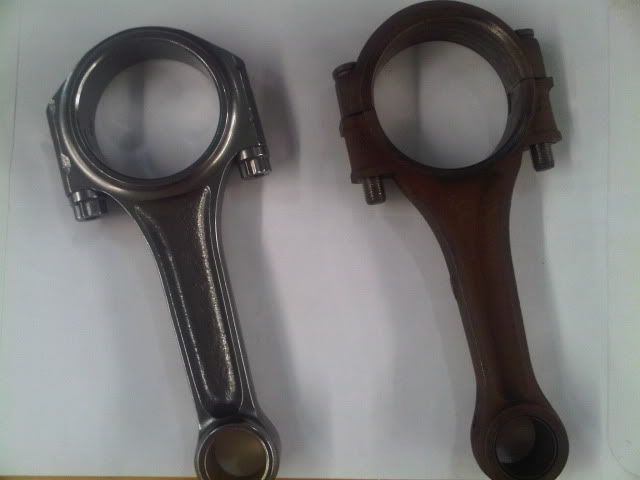
On to the crank and rods. I'm using a 78mm stroke CB Performance crank. It counterweighted, nitrited, forged, 4130 chromoly, 8 dowels. It has chevy rod sized journals, which are smaller. This is a stroker, so this gives us more room in the crankcase without machining. The other advantage is that the surface speed on the rod bearing is slowed down because of the diameter change for less wear and heat. And the connecting rod is lighter due to being smaller for a lighter combination.
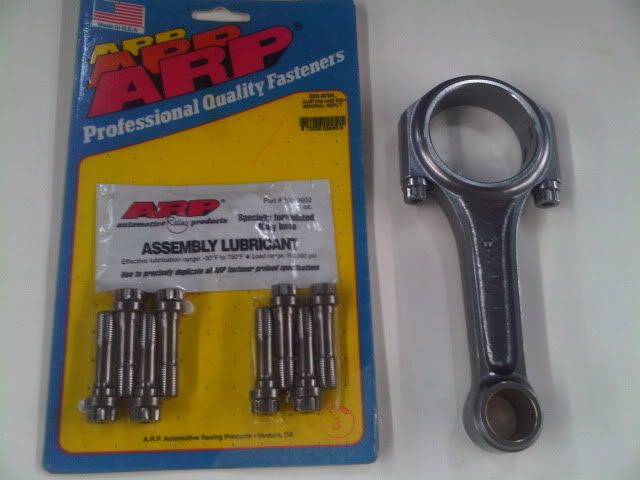
The rods are made of a high grade alloy, are smaller, and note they don't have any nuts.
The rod bolts are ARP's best bolts, the highest quality on the market. A difference of $300 just for these bolts, thank goodness Ray had these sitting in inventory for a while, so I didn't have to pay that much or I wouldn't have been using them.
Next up cc'ing the heads and assembling the long block...
Submarine Driver
Posts : 189 Join date : 2011-09-11 Age : 32
Subject: Re: Hugo's engine build at the Magical Place (Vallero's Machine Shop) Wed Sep 28, 2011 1:32 am
What's the weight difference of the rods and pistons compared to a factory piece? I understand that they won't be the same style's but I'm sure there are massive weight savings(I think I got to feel the rod last time I was there).
dsimas
Posts : 788 Join date : 2011-06-02 Age : 61 Location : Auburn
Subject: Re: Hugo's engine build at the Magical Place (Vallero's Machine Shop) Wed Sep 28, 2011 1:59 pm
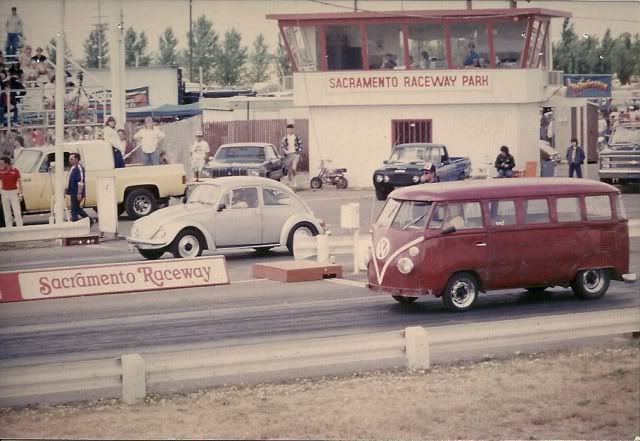
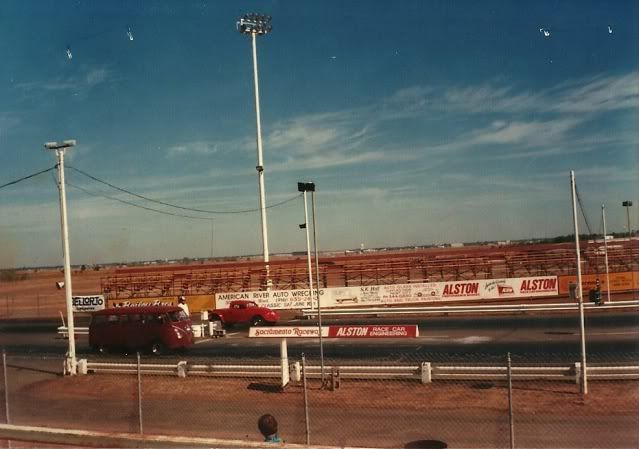
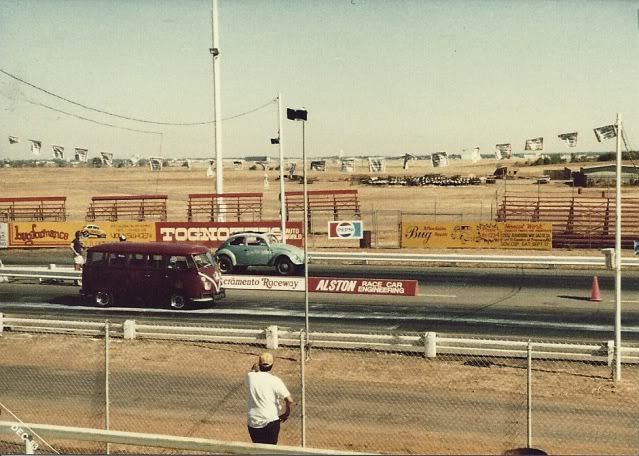
I will be using Ray's daughter Lynda's heads from her old racebus. They've already been machined and were laying around for 20 years....this will save us some time. Just for giggles, here she is racing her bus from 1983-'84, she got high 14's in the 1/4 mile.
Her motor:
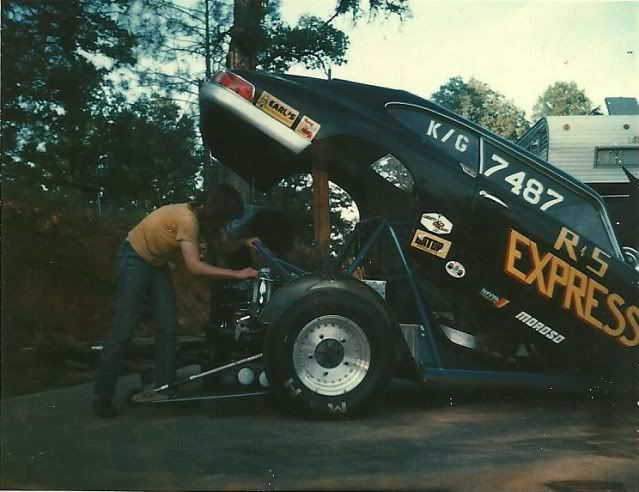
And Lynda with the racecar when she was about 14 years old:
Oh heck, while we are at it, here she is when she just got started into racing with her daddy:
Ahem, okay, back to this build...
Here's Ray describing what had already been done to the heads:
One fin has been removed:
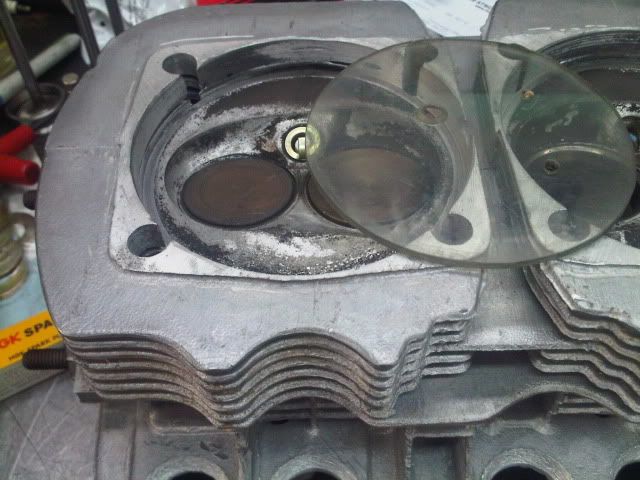
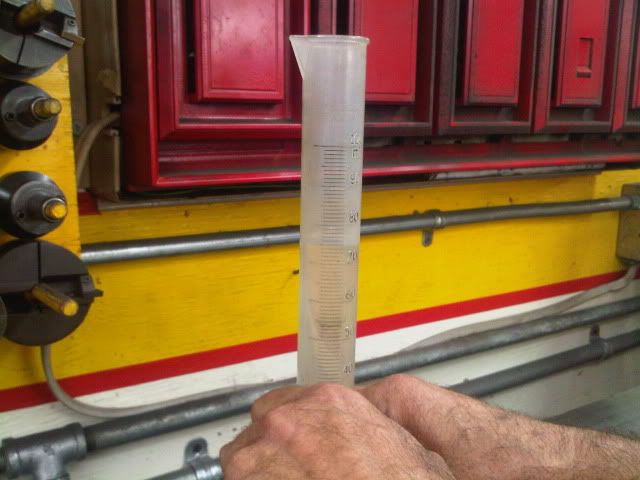
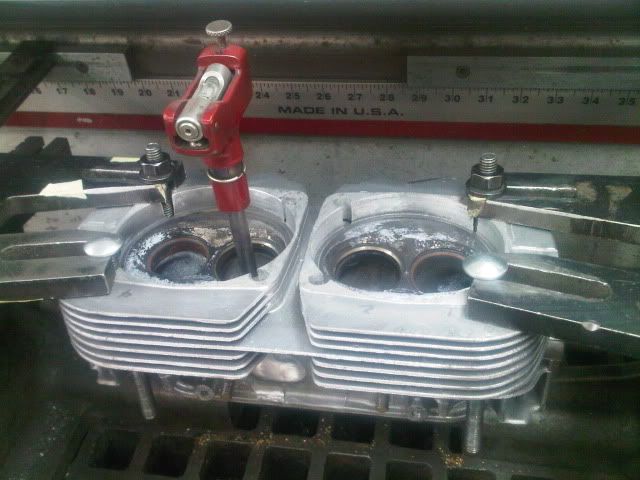
This head is prepared to be cc'd. It has the spark plug and the valves in it. We will add water to a level and measure it.
This is the plate that will sit in the cylinder head to measure.
We want 9.68:1 compression on this engine. So we look up that up on the compression ratio sheet (under the bore and stroke) and we need 46.5 head cc's. Lynda's only came to 26cc. So, Ray will grind the head to flow better near the intake valve. This is called unshrouding the valve.
Measuring the seat diameter so that he can set the cutter on the Valve and Seat Machine:
Using the fixture to set the cutter for the correct diameter. Ray radiused the cutter for shaping head bowls.
Quick note: On 94's the stud holes may break free as shown here, but its ok since the cylinder seals at the face of the head, not the sides.
Preparing and leveling the head for machining on the Tobin-ARP machine:
This shows the radiused carbide cutter insert.
Removing the material from the bowl is a reference to get the correct diameter to hand finish the bowl down to the seat without damaging the spark plug boss. The cutter will damage the boss beyond what is done here, so the rest was done by hand.
That only removed 6cc's or so, and we need to take down 20cc. So Ray had to hand grind using a ball mill cutter to shape the bowl further. He unshrouded the bowl to slough off more compression. We cc'd the head again and still haven't taken enough, so the compression will be about 10:1.
Next up, manifolds and carbs...
Submarine Driver
Posts : 189 Join date : 2011-09-11 Age : 32
Subject: Re: Hugo's engine build at the Magical Place (Vallero's Machine Shop) Wed Sep 28, 2011 2:41 pm
I don't quite know what to say besides 1. He does amazing work 2. I wish that I could be a part of it!
Friday's almost here
Thank you Dawn for taking not only pictures, but videos they really do so explain alot.
silvertonguedevil SacTown
Posts : 3101 Join date : 2011-01-13 Age : 47 Location : Seaside, Oregon....er, I mean California
Subject: Re: Hugo's engine build at the Magical Place (Vallero's Machine Shop) Wed Sep 28, 2011 3:45 pm
I've heard about that Bus! That's quick for one of those! Where is it now? Cool pics by the way!
dsimas
Posts : 788 Join date : 2011-06-02 Age : 61 Location : Auburn
Subject: Re: Hugo's engine build at the Magical Place (Vallero's Machine Shop) Wed Sep 28, 2011 3:51 pm
Submarine Driver wrote:
What's the weight difference of the rods and pistons compared to a factory piece? I understand that they won't be the same style's but I'm sure there are massive weight savings(I think I got to feel the rod last time I was there).
Chris, 35grams per rod and 35 grams per piston.
Greg, Sadly Lynda's bus was parted out. They had a great idea for something called a Freight Train if I remember correctly. They were lengthening it or something, was going to be a show stopper. Project never finished and parted it out after it was cut. I may have this wrong in the specifics.... ask Ray sometime. It's a good story. When she was racing it, it was a 1776cc, they made it a 1915cc when it got it's best times. Always with a teenage girl behind the wheel, dudes hated that. She was the crowd favorite every time. It was a driver too. She and her brother laid it down by accident one time. Flipped it back and drove back to the shop, but it was sort of flattened on one side, I think it shows in the pics. I got to drive it once. It was a great bus. Lynda is a chip off the old block and knows her stuff.
Sponsored content
Subject: Re: Hugo's engine build at the Magical Place (Vallero's Machine Shop)
Hugo's engine build at the Magical Place (Vallero's Machine Shop)